
Reference Project architecture: 
In this lab, I will install and configure VMware vSphere ESXi host on my virtual Environment.
The tasks list for the lab 2:
- To install
 VMware vSphere ESXi host
 - To Configure ESXi Customize System Setting
- Connect to an ESXi Host with the vSphere Client
- View the Host Hardware Configuration
- Configure the DNS and Routing Information for an ESXi Host
- Configure an ESXi Host as an NTP Client
- Configure an ESXI Host to use Directory Services
VMware ESXi is an operating system-independent hypervisor based on the VMkernel operating system interfacing with agents that run atop it. VMware describes an ESXi system a stateless compute node. VMware vSphere ESXi is a host. It is a free bare-metal hypervisor that virtualizes servers so you can consolidate your applications on less hardware.
Steps for the task: To install VMware vSphere ESXi host
Prerequisites :
a. Download![]() the ISO
the ISO
b. Boot host from the ISO
Step 1: You need to create an ESXi Virtual Machine host. I am posting below the snapshot of installation step by step so that you can follow it. 


FreeBSD is an operating system for a variety of platforms which focuses on features, speed, and stability. FreeBSD is a similar kind of Linux system but FreeBSD has notably higher performance than Linux.
Select the location of your iso.
I selected two network adapter as per my network diagram architecture. If your network requires more network adapters, add more network adapters. The selection of adapters is based on your network diagram.


Now my ESXi host is ready. I will now boot the system from the iso.
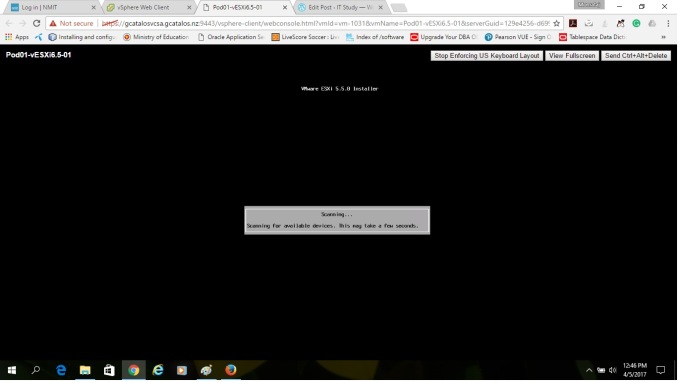
Step2: Power on your host power button before you boot it. Then your VM host will automatically boot from your iso. 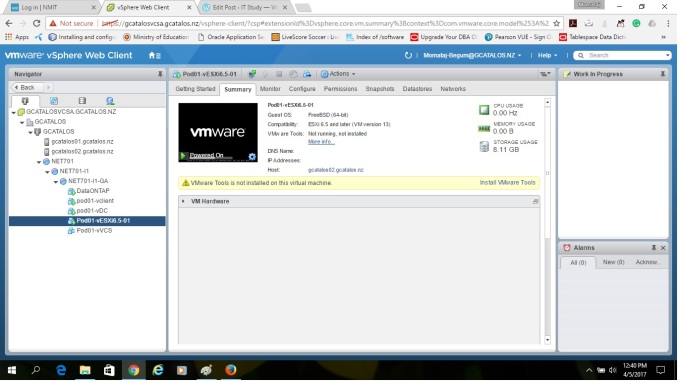
Step 2: After starting your VM host, You will see a direct console user interface (DCUI) that is almost similar to the computer BIOS.

Press “ENTER” for running your installation.

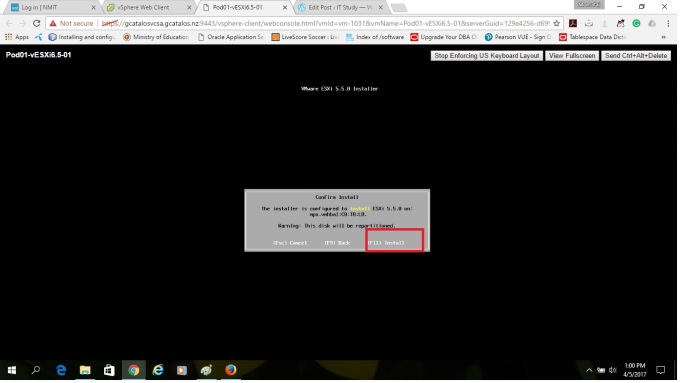
You must agree upon with their agreement to continue the installation. Press F11 from your keyboard.
Do you want to upgrade the system or install![]() ? press Enter to continue installation
? press Enter to continue installation![]() .
. 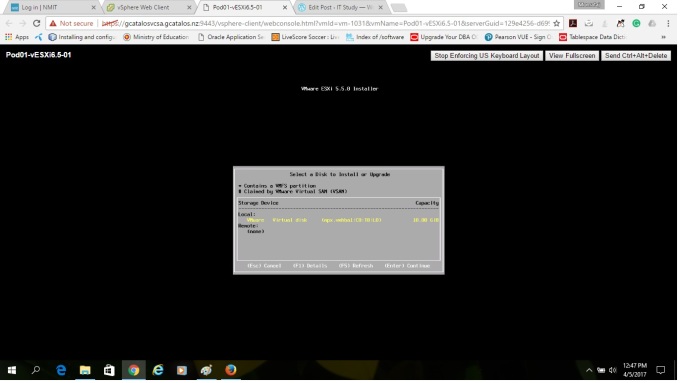
Select the keyboard layout that is similar to your keyboard layout. Otherwise, your function key and other keyword fail to work when you will do further configuration on DUCI interface.
Provide your root password. Remember, It must be 7 characters long.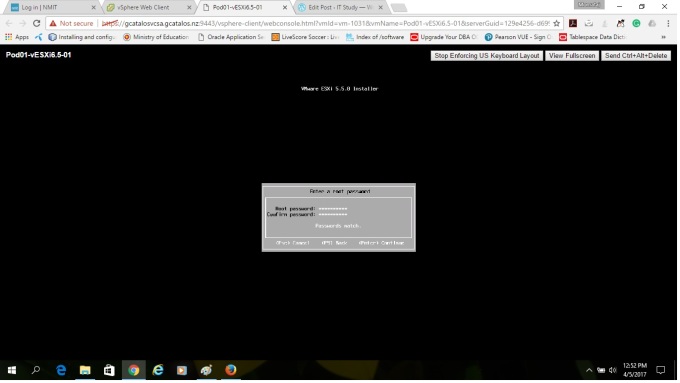

Without warning, installation is not fun! You will get a “Hardware Virtualization Warning: Hardware Virtualization is not a feature of the CPU or is not Enabled in the BIOS”.
This warning you will get because you are installing the ESXi host in the virtual environment and systems could not able recognise your hardware system. Just ignore it and Press “ENTER” and go forward to complete your installation without tension 🙂

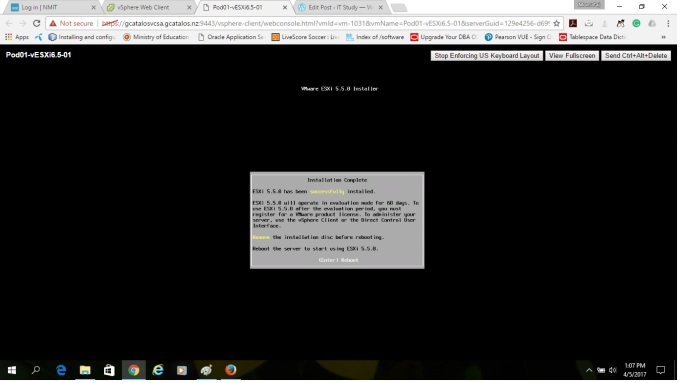
VMware ESXi installation begins. It will take sometimes to complete. just relax!.

After successfully complete your VMware ESXi Installation, You need to reboot once your system before performs configuration.
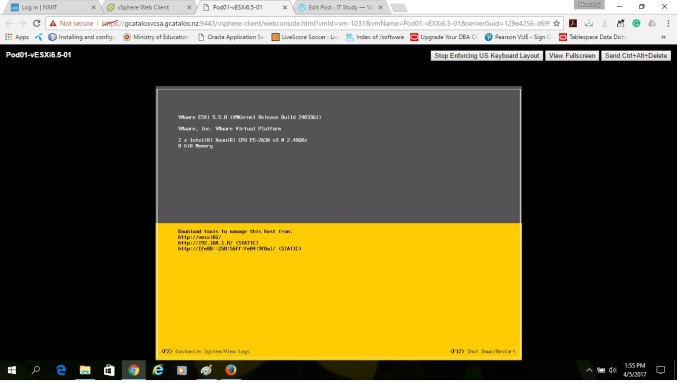
This is direct console user interface (DCUI), you can see after installation of ESXi host

Steps for the task: To Configure ESXi Customize System Setting
In this step, You need to do certain setting for ESXi Host. To start Customize System Setting, Press F2!
Note: The DUCI is the lower-level interface for configuration and management. It uses primarily for initial basic configuration and access through the console of the server.
Step1: Root Access: Set the root password [must be complex, to avoid unwanted access system]. The administrative username for the ESXI is root. Note: The default password for the root user has not been changed.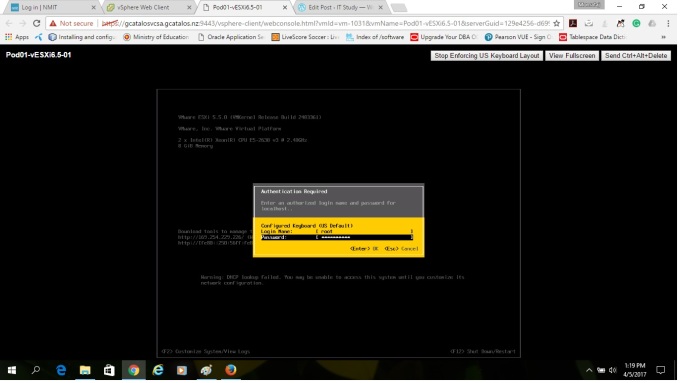
Now you are system customization page: 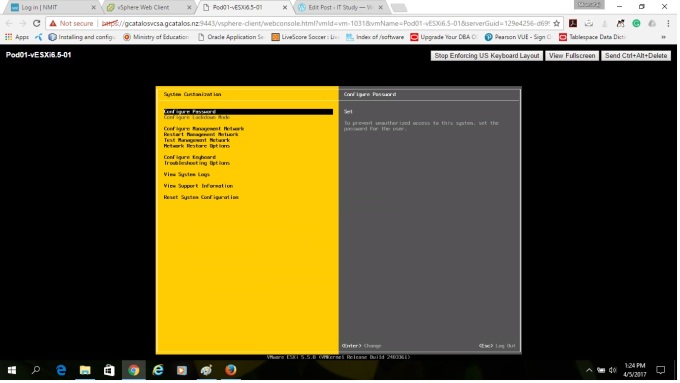
Configure Password: Select configure password and press ENTER![]() . This password prevents unauthorised access to your System. Therefore, You need to setup complex password. Recommendation: Choose eight characters long password with upper and lowercase characters and at least one digit and special character.
. This password prevents unauthorised access to your System. Therefore, You need to setup complex password. Recommendation: Choose eight characters long password with upper and lowercase characters and at least one digit and special character.

Step2: Configure Lockdown Mode: We are not setting up “Enable or disable lockdown mode”. But I would like to share some information here because, in the production environment, you need to use it.
Lockdown mode disables means all access allow except for direct root access for ESXi host machines. That means you can only operate your ESXi host operation only from vCenter Server. The user with special DCUI privilege only can sign on the user interface.
Step3: Network Setting. In this step, DCUI allows you to setup hostname, IP configuration and DNS Servers, you can also able to modify management network, configure VLAN setting and others network related setup. Note: You must need to setup IP address before ESXi host is Operational. 
IP Configuration: Remember: By default, a DHCP-assigned address is configured for the ESXi host. You can change it manually. 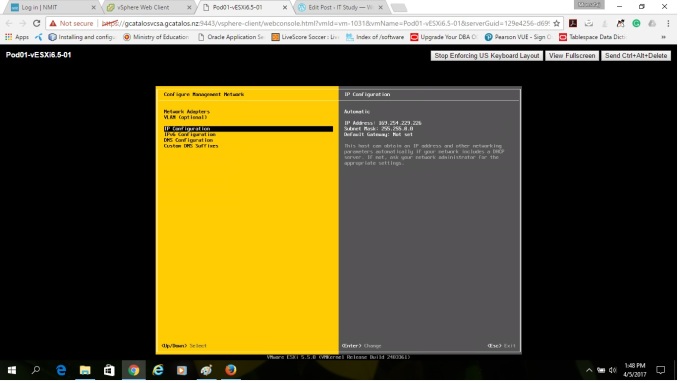

DNS Configuration: 

Note: You can restart management network without reboot the system, test the system after configuration by using ping request, you can disable the management network.
Steps for the task: Connect to an ESXi Host with the vSphere Client
In this task, I will install![]() VMware vSphere client software that will help me to log into a VMware ESXi host.
VMware vSphere client software that will help me to log into a VMware ESXi host.
Prerequisite: VMware vSphere client software Download![]() the software .exe file and finish the setup by following “NEXT” “NEXT” manner.
the software .exe file and finish the setup by following “NEXT” “NEXT” manner.
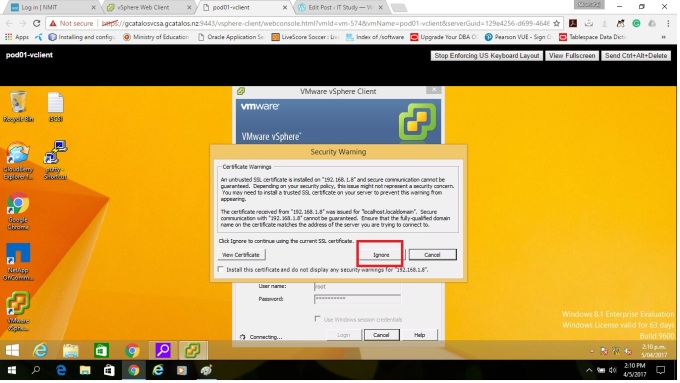
Step1: You need to log into a VMware ESXi host by using the vSphere Client.
Give the ESXi IP address, hostName, root password credential to log in the ESXi host.
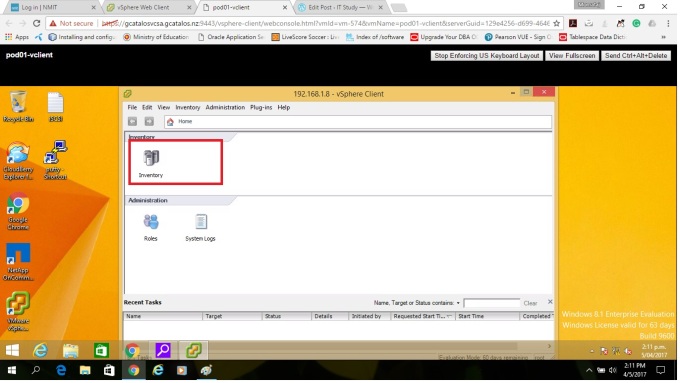
Your host must be displayed in the inventory panel. If you don’t get host click->Home->Inventory menu bar to get host panel.
Steps for the task: View the Host Hardware Configuration
In this task, I will show you host Hardware configuration tabs. You can view the health of the host hardware, processor and memory information as well.
Step1: To check hardware health status, Click the “Configuration” tab. For details information, click “Sensor” list.
Step2: To check the processor status. Hardware list, Click Processor. You can view processor model, speed, sockets, and other information of your ESXi host.
Step3: To verify the memory status, Click “Memory” from the Hardware List. You will able to see total physical memory status, System Memory and memory available for the VMs.

Steps for the task: Configure the DNS and Routing Information for an ESXi Host
In this task, I will show how to configure the DNS. I already configured my ESXi Host DNS from DUCI interface. But we can also configure it from vSphere Client.
Step1: Go to the Configuration tab, Select “DNS and Routing” link from software pane. Then click “Properties” link. Provide the information of your Hostname, Domain, and DNS IP address. Then click “OK“
Step2: Provide the IP address for the VMKernel default gateway

Step3: If you receive an IPV6 warning, click “Ok” to continue.

Step4: The DNS Configuration Summary:

Steps for the task: Configure an ESXi Host as an NTP Client
System synchronise is very important for many applications. NTP is an Internet standard protocol that is used to synchronise computer clock in the network. It helps to get the accurate time stamp for the log message, performance data can be interpreted properly and VM can synchronise their time with the ESXi host.
It is client-Server protocol therefore when you configure the ESXi host to be an NTP client, the host synchronises its time with an NTP server, and NTP server can be the Internet or any NTP server in your corporate environment.
Step1: Select your Configuration tab from your ESXi Host and Select “Software” panel, Click “Time Configuration“. 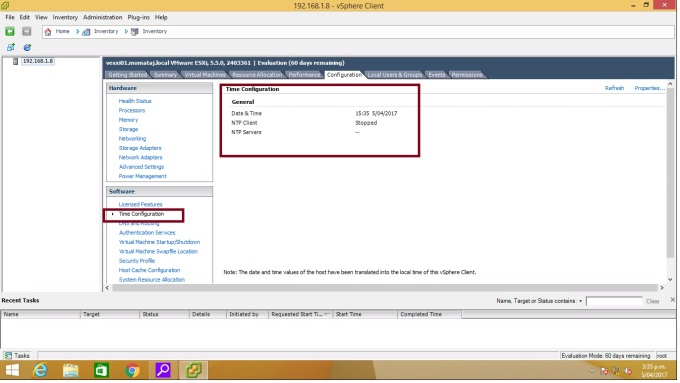
Step2: Click Properties for “Time Configuration” 
Step3: Click “NTP Client Enable“” from the option “NTP Configuration” and click “Options“. Select “Start and stop with host” checkbox from General.
Now click NTP setting: Now you need to add “NTP Server” Name. Provide the IP address of the server in the “Add NTP Server” dialogue box. 
Then Select the checkbox of “Restart NTP service to apply changes” and click “OK”
Now you need to run your “NTP client”. Click “Start” from service commands.


Note: If your NTP client has not “Running” after configuration, Go to the General from the Options of Properties dialogue box and click “Start” to run the NTP service.
Steps for the task: Configure an ESXI Host to use Directory Services
In this task, I will configure ESXi host to use domain controller service such as Active Directory to users manage.
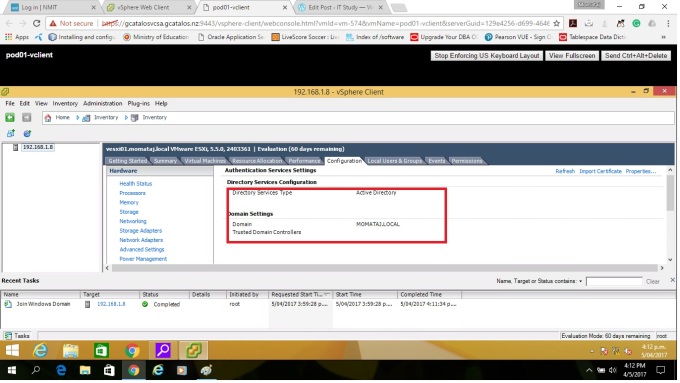
Step 1: To configure the Active Directory, click “Authentication service” from software of your ESXi host. 
Step2: Click “Property” link. Select Directory Service Type: Active Directory and provide your domain name in the Domain setting box [momataj.local is my domain name]. then click “Join Domain”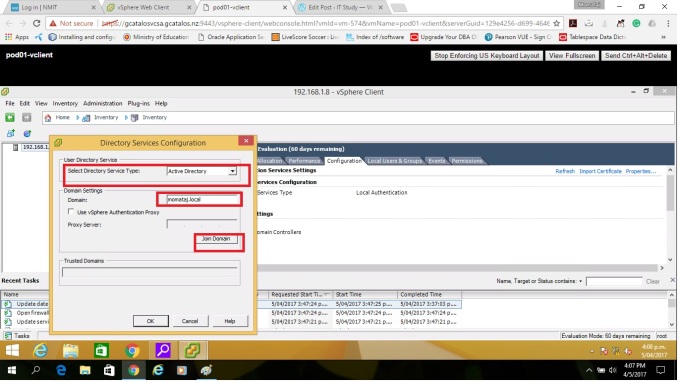
Step3: Type your domain administrator username and password 

Problem: You may face problem during installation![]() of VMware vSphere web client as ” error 28173.Setup failed to enable Microsoft.NET Framework 3.5″
of VMware vSphere web client as ” error 28173.Setup failed to enable Microsoft.NET Framework 3.5″
Solution: You need to enable Microsoft.NET Framework 3.5 to fix this error. You need to an active Internet connection on your machine if it doesn’t under internet service. Go to the control panel -> program and features -> Select “Turn Windows features on or off“. Then Select.Net framework 3.5. It will take sometimes to install. After installation of.Net Framework 3.5, you will able to install![]() VMware vSphere web client without any error.
VMware vSphere web client without any error.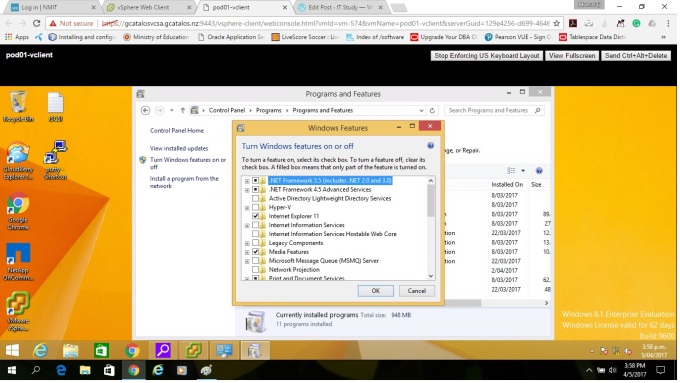
Lab Instruction: You need to install![]() and configure ESXi host 2 according to the network architecture. To install and configure ESXi02, follow the steps that I used for ESXi host 01.
and configure ESXi host 2 according to the network architecture. To install and configure ESXi02, follow the steps that I used for ESXi host 01.
Thank you 🙂

One thought on “Lab 2: Configuring VMware ESXi”