
In this tutorial, I am gonna discuss how you can configure your system image and files backup and restore them using windows built-in-utilities without third-party utility Tools.
Task lists:
- Configure a System Image Backup in Windows 7, 8, or 10
- Configure a system repair disc that you can use to start your computer and restore a backup image
- Restore Personal File, How to configure File History Settings
- Schedule of file saving and how long you want to keep saved versions
Features are: Windows built-in File History feature
Backup and Restore feature including Create a System Image image and a System Repair disc
File History feature gives you the facility to save a copy of your files to another location
A system image backup is a full snapshot of an entire hard drive. The benefit of a system image is that if a hard drive crashes, you can replace it, restore the image, and get back to your system where it was when the image was last captured. You don’t require to reinstall Windows or your applications.
Steps for the task: Configure a System Image Backup in Windows 7, 8, or 10
Windows 7, 8, 10 have the same technique to create a system image backup. As I am a windows 10 user, I am going to show it in windows 10.
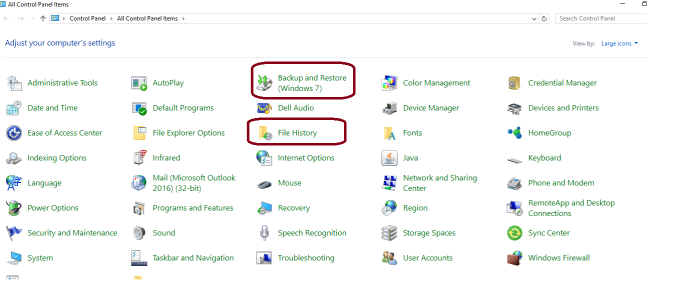
Step1: Go to your control panel and choose “Backup and Restore (Windows 7) or you can select File history
Step 2: Now you need to click on “Create a system image”
Step 3: Now you can see a new window and get a message why you need to save the backup and the options in where you can save your image backup.
- If you want to save the backup on your pen drive or hard drive, select the first option “On a hard disk”
- 2nd option: “on One or more CD/DVDs” if you want to save the backup on CD/DVD disk
- 3rd option: “On a network location” if you want to save the backup file in the different network location
In my case, I am using option 2 “On one or more DVDs”

Step 4: Click Next button after selecting your desired backup location.
Confirm your backup settings by clicking on “Start backup“


You must be logged in to post a comment.