Module 2: Create and manage PostgreSQL user, database, table , and setup user privilege

In this blog, I am going to discuss general administration activities for the PostgreSQL database system using psql console.

The lists of tasks

  • Login PostgreSQL database
  • Create user , alter and drop user
  • Create new database and connect to the new database
  • Revoke public roles
  • Grant user privilege
  • create simple table
  • Testing users privilege

Task 1: Login PostgreSQL database

Login the database using the superuser postgres by the following command: sudo su postgres

1.jpg

Login the psql console for database postgres and user postgres using the following command: psql -d [database name] -U [user name]

2

Task 2: Create user , alter and drop user

Create user: Create user [username ] with PASSWORD ‘Type your desire password’;

3.jpg

Alter user: If you want to change password for the user, you need to execute alter sql command

Alter user [username] WITH PASSWORD ‘type change password’;

4.jpg

Drop user: drop user [user name];

\du – you can see the list of users. I am going to drop user ‘testuser’

5.jpg

You can see after executing the drop user DDL query, usertest has been dropped.

6.jpg

Task 3: Create new database and connect to the new database

Create new database sql: create database [database_name];

7

Connect to the new created database testdb:

\c database_name

8

Task 4: Revoke public roles

Revoke all [roles] on Database [name of database]  from public;

Revoke all [roles] on Schema [Schema name]   from Public ;

9

Task 5: Grant user privilege 

In this section, I will discuss how to give grant privilege to the users.

10

As you see, I have two users: readonlyuser and write user. They have no roles.  I am going to give read privilege to the readonlyuser, and write privilege to the writeuser, and connect privilege both users.

Connect privilege sql: GRANT connect on Database [name of databse] to user;

11.jpg

Read Privilege to readonlyuser: GRANT  SELECT on all tables in Schema public to user [read only username];

Write Privilege to writeuser: GRANT SELECT, UPDATE, INSERT, DELETE on all tables in SCHEMA PUBLIC to user [writeuser];

12

\z help you to check the privilege access for users

Task 6: Create simple table 

Create simple table sql: create table [table_name] (id serial, name varchar[10]);

13

Task 7: Testing users privilege for readonlyuser and writeuser.

14

You can see Schema Public has not allowed to anyuser. Now I will give select privilege to readonlyuser and insert, update, and delete privilege to the writeuser for table and sequence.

Readonlyuser: GRANT SELECT ON ALL TABLES IN SCHEMA PUBLIC TO readonlyuser;

GRANT SELECT ON ALL SEQUENCES IN SCHEMA PUBLIC TO readonlyuser;

GRANT USAGE ON SCHEMA PUBLIC to readonlyuser;

\z

15.jpg

Writeuser: GRANT SELECT, INSERT, DELETE, UPDATE on ALL tables in schema public to writeuser;

GRANT SELECT, UPDATE on all sequences in schema public to writeuser;

GRANT usage on schema public to writeuser;

\z

16.jpg

User login in the psql console:

psql -h localhost [IP address in case remote login]  -U username [databasename]

17.jpg


You can see readonlyuser can not execute insert sql  because of not access privilege

20.jpg

On the other hand, writeuser can insert the data into the table because of grant privilege for insert.

21.jpg

Task 8: Default privilege for all tables in public schema of database

Alter default privileges in schema public grant select on tables to [username]

By this SQL privilege, user can read all tables in the schema, doesn’t need to individual privilege each time when new objects will create.

22.jpg

23.jpg

Tip:

how to clear screen psql console ?
Standard bash clear commands (e.g. Ctrl+l) clear screen and log me out
If you are on linux try \! clear if you are using windows try \! cls

Thank you 🙂


Module 1: Installation of PostgreSQL on Linux Server

In this blog, I will discuss how to install and configure PostgreSQL on Ubuntu System.

The list of tasks:

  • Installation procedure of PostgreSQL for Ubuntu

Installation Procedure of PostgreSQL for Ubuntu:

Step 1: Login your Ubuntu Server to install PostgreSQL

First you need to update the system using sudo apt-get update command

12

Step 2: install the PostgreSQL using the following command. I am going to install PostgrSQL 9.63456

Step 3: Now you can see the PostgreSQL configuration files using ls /etc/postgresql/9.6/main [version can be differ] 7

Step 4: The default user for the PostgreSQL is postgres. Postgres is also known as root or super user. login the PostgreSQL using postgres user by sudo su postgres

8

Step 5 : Login the psql command prompt …….. type : psql

you can see the postgres user psql command prompt in where you can execute sql query to create and manage databases, users, schema, and db objects.9

Step 6: \l – will show you the list of databases

\du – will show you the list of users in the PostgreSQL database10

Thank you 🙂


G Suite Referral Program

If anyone interested in Professional email, online storage, and more. Choose your G Suite plan. The first 14 days are free.

https://goo.gl/QYQUFX

Promo codespromo codes :

G Suite Basic Plan  H4HQJVVQMYR4A9V

G Suite Business Plan  H3NJDPWKGRJ4XJD

Each promotion code provides 20% off the first year on either G Suite Basic plan or G Suite Business plan*.

You get:

  • Fast migration to cloud email with Gmail
  • Secure online storage and collaboration tools with Google Drive
  • An exclusive 20% discount for their first year

You get:

  • Provide cutting-edge solutions to solve your clients’ IT needs
  • Become part of the Google community
  • Earn up to NZ $4,000 per business

G Suite includes:

  • Online storage
  • Business email address (info@yourname.com)
  • Security and admin controls
  • Phone and email support from real people 24/7
  • Video meetings
  • Offline and online capabilities


Thank you 🙂


Oracle Database 12c Installation on Linux

In this blog I will discuss how to install Oracle database 12c on the Oracle Linux environment.

a. Pre-requisite check of your system step by step before beginning installation:

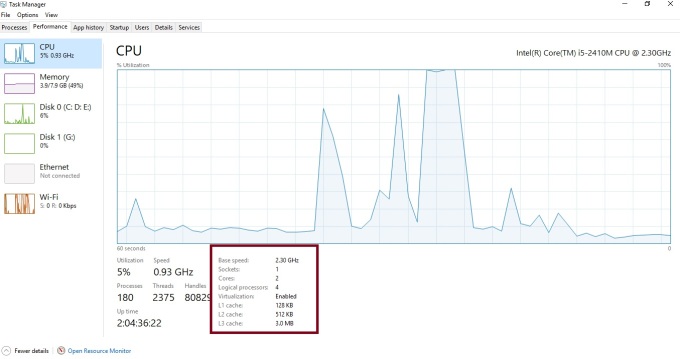
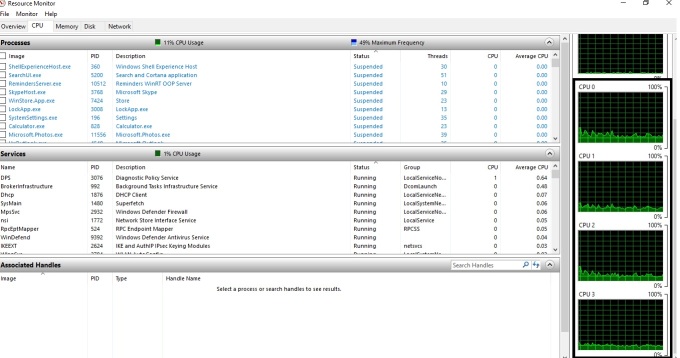
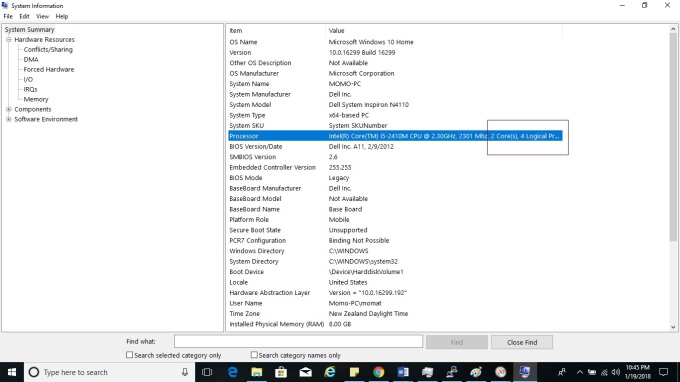
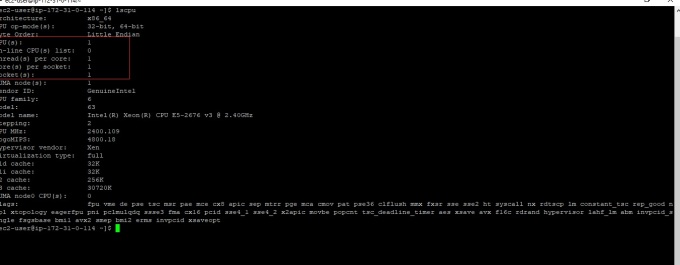
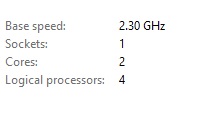
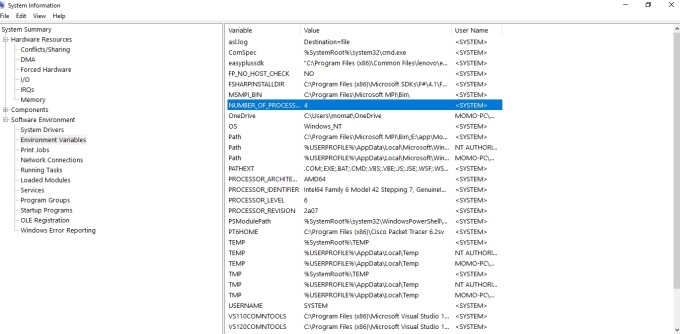
  1.  Server Requirement minimum for production environment: > 8 Cores and > 64 GB RAM

Useful linux command:

uname –a [check os kernel]

uame –m  [check processor]

uname –r [check version]

Cat /proc/version           — linux version check

grep  MemTotal /proc/meminfo

grap  SwapTotal /proc/meminfo   or cat /proc/meminfo | grep SwapTotal

[ 1 GB and 2 GB = 1.5 times of the RAM, 2 GB and 16 GB = equal  to RAM size,  >16GB = 16 GB]

df –h /dev/shm [share memory info]

df –h /tmp [disk space available check  ]

du  -sh usr [specific user disk space check]

  1. Storage Capacity : Recommendation dedicated Storage system : SAN /NAS/ASM, Avoid Local Disk File system
  2. Host Name Resolved such as DNS name or local host name

#hostname

Location to check /etc/hosts by the following comment: cat /etc/hosts

Edit host file using the following command: vi /etc/hosts  [insert new line- press i, save: w, quit :q]

<IP-address> <fully-qualified-machine-name> <machine-name>
Example: 192.168.1.14  graphit.com  oracle-linux

  1. Operating system configuration

Install the oracle pre-requisite RPM

#yum install oraclerdbmsserver12cR1preinstally [this command will take care all RPM dependency if you install 12c on Oracle Linux, otherwise you need to install all pre-requisite RPM for other Linux Version ]

list of RPM packages for other Linux Server:

yum install binutils -y
yum install compat-libcap1 -y
yum install compat-libstdc++-33 -y
yum install compat-libstdc++-33.i686 -y
yum install gcc -y
yum install gcc-c++ -y
yum install glibc -y
yum install glibc.i686 -y
yum install glibc-devel -y
yum install glibc-devel.i686 -y
yum install ksh -y
yum install libgcc -y
yum install libgcc.i686 -y
yum install libstdc++ -y
yum install libstdc++.i686 -y
yum install libstdc++-devel -y
yum install libstdc++-devel.i686 -y
yum install libaio -y
yum install libaio.i686 -y
yum install libaio-devel -y
yum install libaio-devel.i686 -y
yum install libXext -y
yum install libXext.i686 -y
yum install libXtst -y
yum install libXtst.i686 -y
yum install libX11 -y
yum install libX11.i686 -y
yum install libXau -y
yum install libXau.i686 -y
yum install libxcb -y
yum install libxcb.i686 -y
yum install libXi -y
yum install libXi.i686 -y
yum install make -y
yum install sysstat -y
yum install unixODBC -y
yum install unixODBC-devel -y
now, i installed all packages

rpm  -q package name [ checking package install or not!]

rpm –qa /grep  -i package name

ls  -l /grep package name

rpm –ivh package name [for installation ]

  1. Create oracle user name and group in the OS level before installation of Database system which is given the user OS level authentication and privilege to perform installation

Su  –  [ login to root user]

#groupadd –g oinstall [primary group]

#groupadd –g dba [or groupadd –G dba for secondary group]

$ egrep -i “oracle” /etc/group [ display user group]

#/usr/sbin/usermod -g oinstall -G dba oracle [change group for user]

useradd –g oinstall –G dba oracle [ oinstall is the primary group and dba is the secondary group for the user oracle]
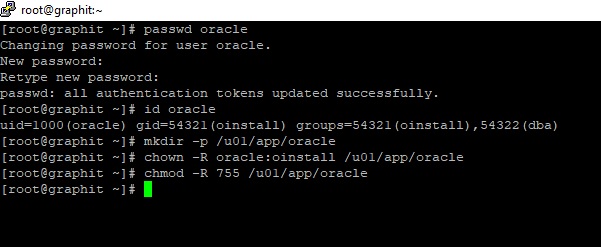
#passwd oracle

id oracle [ check user and group list]

  1. Create directories for oracle base and oracle software

/u01/app/oracle —— Oracle base folder where all oracle software will be install

[root@graphit ~]# mkdir  -p /u01/app/oracle        [ -p means directory is created with sub-directory]

[root@graphit ~]# chown –R oracle:oinstall /u01/app/orale

[root@graphit ~]# chmod –R 775 /u01/app/oracle

[root@graphit ~]# mkdir -p /u01/app/oraInventory
[root@graphit ~]# chown -R oracle:oinstall /u01/app/oraInventory
[root@graphit ~]# chmod -R 755 /u01/app/oraInventory

1.jpg

Create directory for the data files on the disk

/mnt/san-storage/oradata

mkdir – p /mnt/san-storage/oradata

chown –R oracle:dba /mnt/san-storage/oradata

chmod –R 755 /mnt/san-storage/oradata

  1. Add Environment variable for the OS oracle user

#su – oracle
$ cd ~
$ vi .bash_profile
add the following lines

# Oracle Settings

export TMP=/tmp

export TMPDIR=$TMP

export ORACLE_HOSTNAME=grapit.com

export ORACLE_UNQNAME=orcl  [name of databasse]

export ORACLE_BASE=/u01/app/oracle

export ORACLE_HOME=$ORACLE_BASE/product/12.1/db_1

export ORACLE_SID=orcl [name of instance]

export PATH=/usr/sbin:$PATH

export PATH=$ORACLE_HOME/bin:$PATH

export LD_LIBRARY_PATH=$ORACLE_HOME/lib:/lib:/usr/lib

export CLASSPATH=$ORACLE_HOME/jlib:$ORACLE_HOME/rdbms/jlib

su – oracle [ switch to oracle user], edit the path : #vi  /home/oracle.bash_profile

export path [ by copying upper export files and paste it the documents] ESP:W:Q

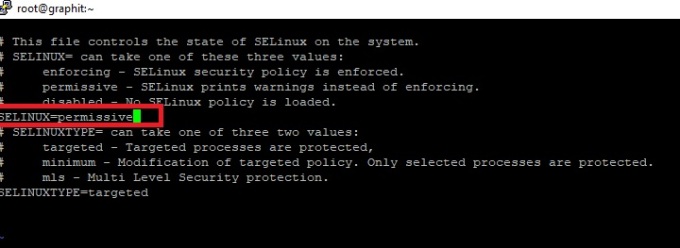
  1. Disable SELinux /etc/selinux/config            make it SELINUX =permissive followed by SETEN force2.jpg

Su – root

Vi /etc/selinux/config

SELINUX =permissive [set it permissive and delete force]

ESP + W+Q [save and quit editor]

#setenforce permissive  [it help oracle user to operate normally]

  1. Disable the Linux firewall or tell you network setup firewall and allowing port for oracle database system

# service iptables stop #service iptables save #chkconfig iptables off

  1. Download oracle 12c software / If you have already downloaded it or brought licensed version for your production. Be continue installation after download part

 su – root

create a folder for download files  /orasoft

mkdir /orasoft

chown –R oracle:oinstall /orasoft/

chmod  -R 755 /orasoft

 passwd oracle  

 login as oracle user

 cd /home/oracle/Downloads [default download location]

ls

move the file to the orasoft directory

 mv filesname /orasoft [location of destination]

ls

cd /orasoft

unzip filename [oracle software zip file name]

cd  database/

ls

b. Install database software: 

Login as Oracle user

su –oracle

cd /orasoft/

cd database/

./runInstaller           [you can see the famous oracle Universal installer screen ]

4.jpg

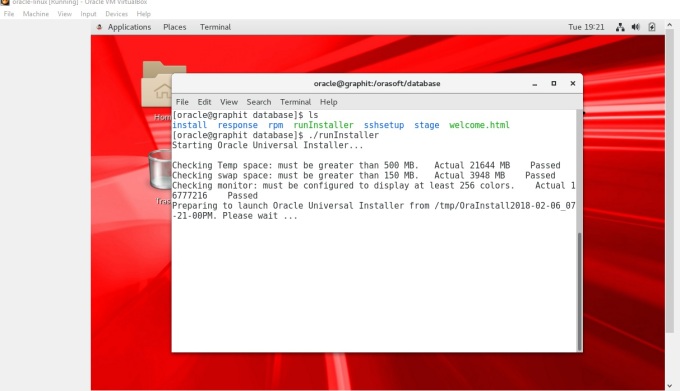
You installation will start with the oracle universal installer 12c

  1.  Configuration Security Update: If you are not Oracle register customer, skip this option

5

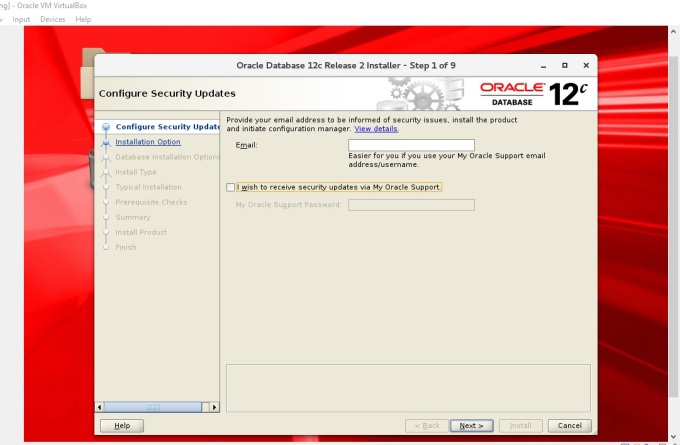
Click “Yes” if you get the following warning.6

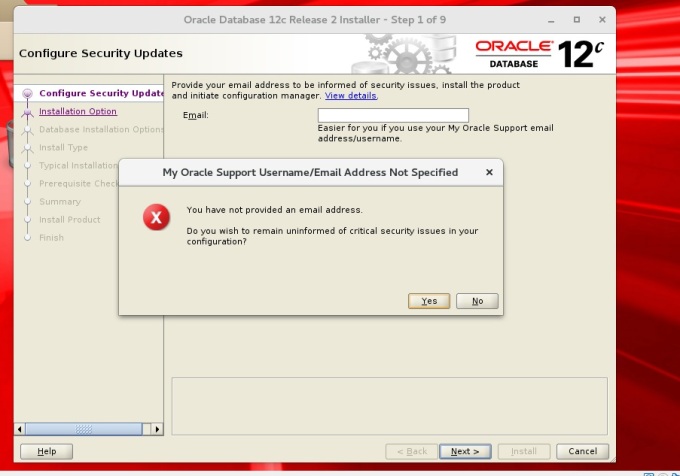
2. Installation Option: You can see 3 options such as you can create and configure a database that means software Instance + Database / only install the database software / upgrade an existing database, for example 11g to 12c version.

In this installation, I am going to select option 2: Install database software only. I will create database later 7

3. Database Installation Options: Select Single instance database installation because the pre-requisite configuration only for single instance. 8

4. Database Edition: Enterprise Edition because it is mostly used solution for mission-critical application system 9

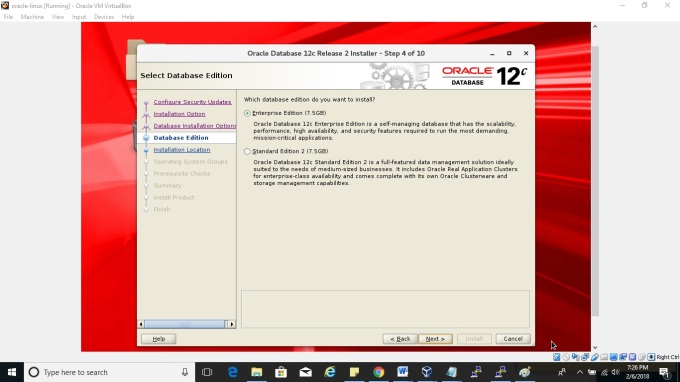
5. Specify the path for the Oracle_base and Software location. Oracle_base is the root folder for the oracle product. All subsequent software and files will be install or reside under the oracle_base folder.

Software location is the sub-folder under oracle-base.10

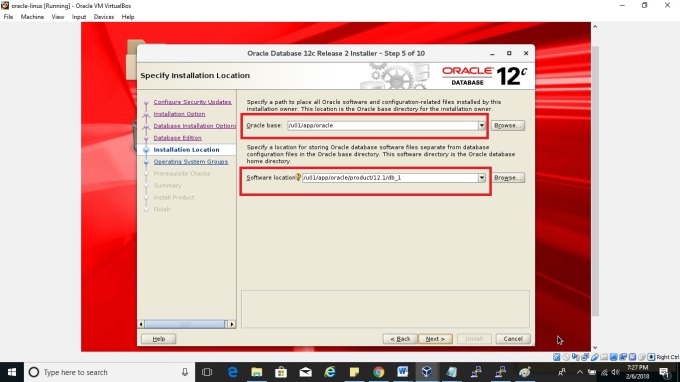
6. Create Inventory : This folder contains all meta data of the installation sets up or install log files. The owner of this directory is the oinstall group memebers11

7.  Declaration of the Operating system groups: set it up based on your organization policy.12

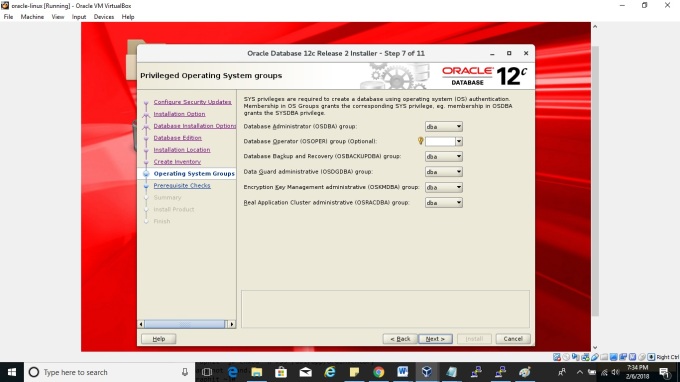
8. Pre-requisites Checks: It will take sometime and check all pre-requisites before installing the software. You will get errors if you don’t meet the pre-requisites. Then you need to fix error for next procedure.13

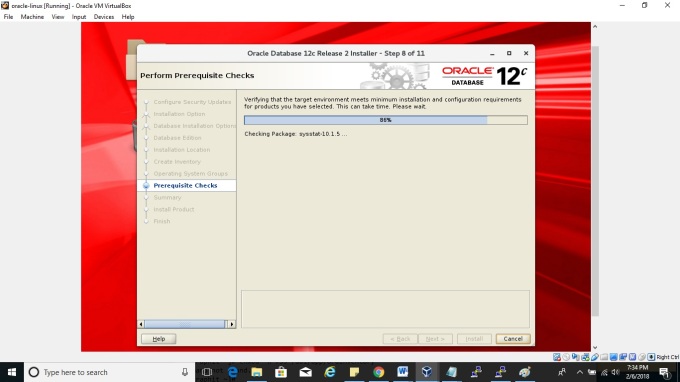
9. Summary of the Global settings and Inventory information14

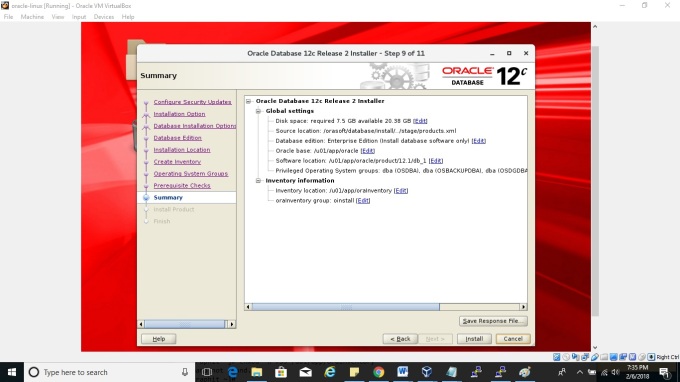
10. Install Product: Process will take time. You need to wait patiently until it complete15

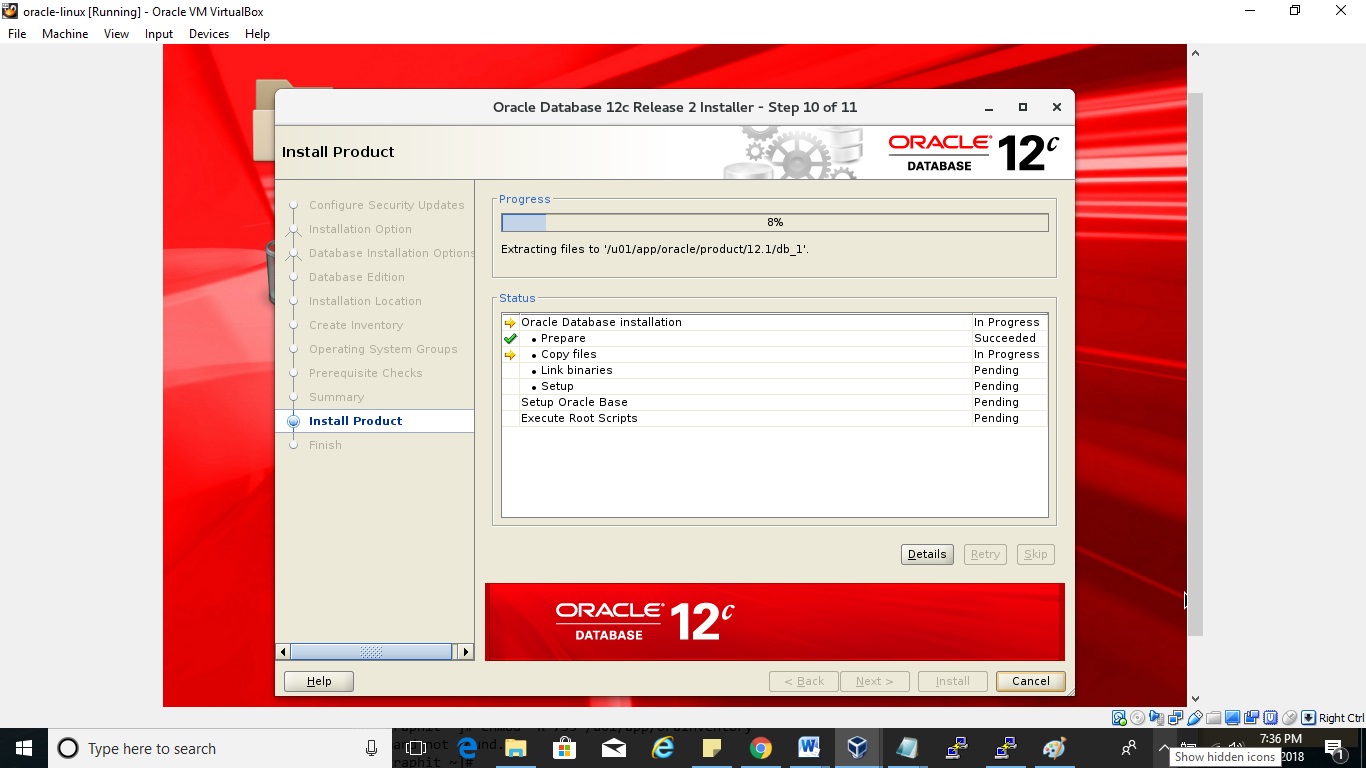
11. After complete installation, you need to run the following two scripts as a root user.

16

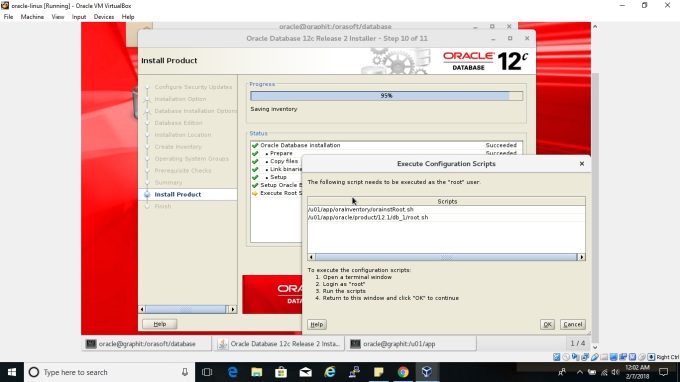
12. Connect your Linux server machine using PuTTY and login as a root user , and execute the first script /u01/app/oraInventory/root.sh17

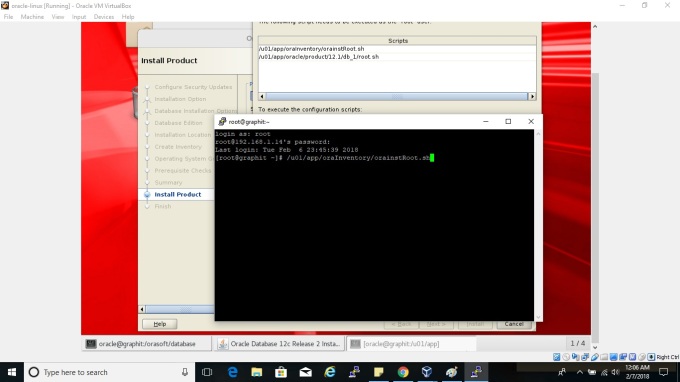
This script change the permission of the inventory directory, and add read/write/execution permission for the group, and revoke all other groups except Oinstall.18

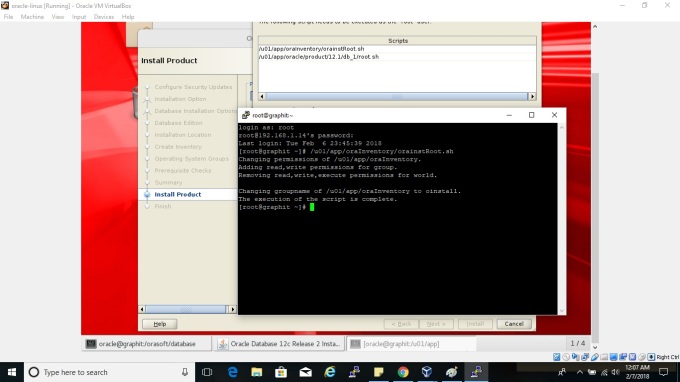
now you need to execute 2nd script /u01/app/oracle/product/12.1/db_1/root.sh19

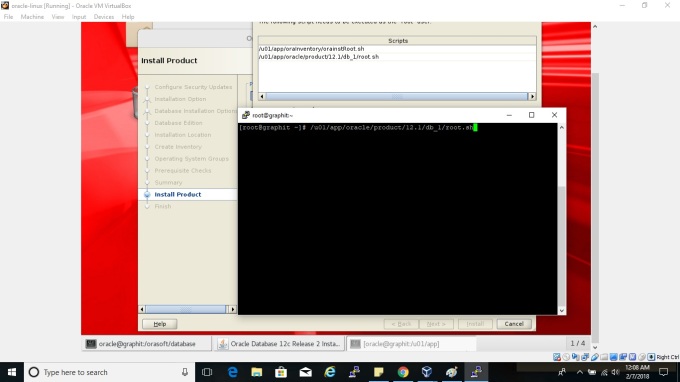
This scripts set the environment variable and insert the full path name into the bin directory, and entities of the configuration utilities are added to the /etc/oratab directory location such as dbca, netca , and create trace file for monitoring database operation.  20

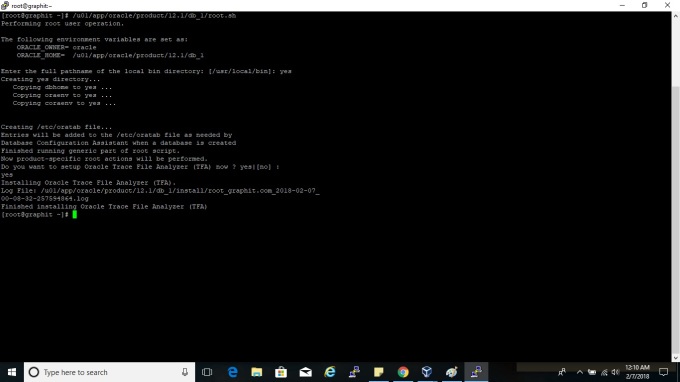
Now you can login Sqlpus as sysdba but database is not available because we didn’t create database yet.  22

The next blog I will discuss  how to create Oracle listener and configure database.


Thank you 🙂


Computer Architecture Concepts: CPU cores calculation

In this blogs, I will discuss how to calculate CPU cores. It will help you to configure system infrastructure and measure performance of the system.

If you are windows user, go to task manager ->  Click on the CPU, you can see your CPU utilization and also summary of you CPU’s details 1.jpg

Click on Open Resources Monitor,  you will get the option down of the screen of task manager.

3.jpg

As you see the above screenshot has shown 4 graphical CPU started from CPU 0 to CPU 3. That means this machine has total 4 CPU’s . Note: Logical processor count: Logical core numbered starting from zero.

You can see your machines CPU(s) and Core (s) information: Number of cores per Physical CPU from the system information (msinfo32.exe). Total number of system cores that windows recognize 2 CPUs at 2 Cores each = 4 total Cores = logical processors5.jpg

In Linux/UNIX type : lscpu for the information of CPU’s of the machine

6.jpg

As you see, In that Linux machine has one socket, one core per socket, and one threat per core = 1 CPU

Calculation of the CPUs = Threads per core (s) X Core per Socket(s) X Socket(s)

=1x1X1 = 1

Calculation of CPU per Cores = Cores per socket X Socket(s) = 1×1 =1

4

Sockets: 1,  means one physical socket which contain single physical chip. It is a physical connector on a computer motherboard.

Cores: 2, means one physical CPU (socket) has 2 cores such as 2 ALU’s and 2 memory units. A core is a basic computation unit of the CPU and It can process a single program or multiple (called hyper-threading).

Logical processor: 4 , The calculation of Logical cores are the number of physical cores times the number of threads that can run on each core through the use of hyper-threading. for example, my 2-core processor runs two threads per core, therefore I have 4 logical processors..7.jpg

Let see, how system architecture works:

  • When you run the programs on the system (windows or Linux), each program consists of one or multiple threads
  • Each threads is the individual sequences of instruction; and two threads can be executed in parallel
  • And each instruction is given to a CPU to be executed
  • The logical decision units inside the CPU will dispatch the different instruction to the different hardware units such ALU does arithmetic calculation. A CPU is the decision maker base on the instruction
  • A core refers to a set of actual execution hardware and each core has an ALU and memory units
  • A socket is the physical slot on the motherboard into which chip is inserted, and that chip has a certain number of core on it.

When Multiple CPUs shared one core – this situation is called hyper threading.

Case 1: 

CPU(s) = 4

Threads per core= 1

Core(s) per socket = 4 

Socket (s) =1

Explain: One physical socket has 4 physical cores which is contain with a chip

Total numbers of CPUs = Threads per core X Core(s) per socket XSocket (s) = 1x4x1=4 CPUs

CPU per cores = Core(s) per socket X Socket (s) = 4 cores total

This machine can execute exactly four instruction at any given time period.

Case 2:

CPU(s) = 16

Threads per core= 2

Core(s) per socket = 4 

Socket (s) =2

Explain: This machine has 2 physical socket and each contains a chip with 4 physical cores = 8 cores total

Total CPUs= 2x4X2 =16

That means this machine can execute 8 -16 instruction at any given time period. However, 16 instruction can be executed when each pair of CPU is executing different type of instruction. Therefore, they don’t need to wait in the queue. The performance will be faster.

Note: Some time you can see your machine number of processor and total numbers of processor are different because some CPUs can be offline. You can only see the online CPUs.

Thank you 🙂


Linux top command to view the processes

In this blogs, I will discuss the Linux top command to view the running processes for you Linux desktop or server machine.

#top : It will show the running process information like as tasks, memory, CPU, Swap

1

#top u username [name of the specific user] -This command will show the specific user running process

2.jpg

# Press Shift + P  (on top of top command output) This command sorted the running process based on the CPU utilization

3.jpg

# Press Shift +O  (on top of the top command output display) , this command sorted the field via field later

4

# Press z [on top of the running process after using top command] if you want to see the running process in colour display for clear view5.jpg

#Press c [ on top of the top command] it will show you absolute path of the running process

6

#Press r [on top of the top command] it will change the priority  of the running process. It called Re-nice a process

7.jpg

#press d  By this option you can change the auto screen refresh interval 3.0 to your own screen refresh interval time

8.jpg # 
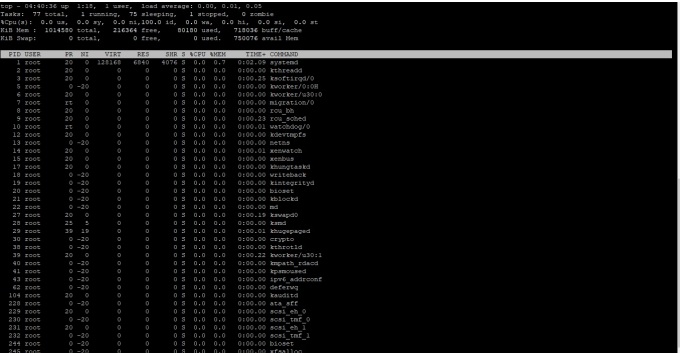
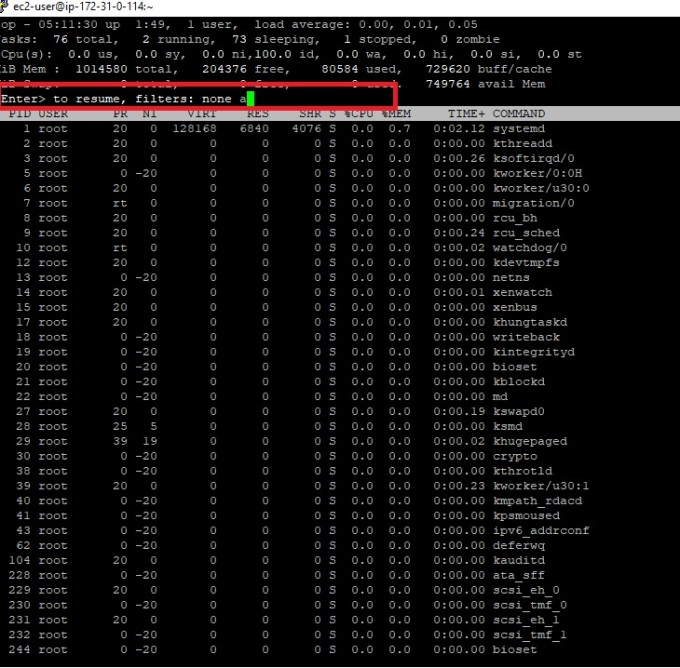
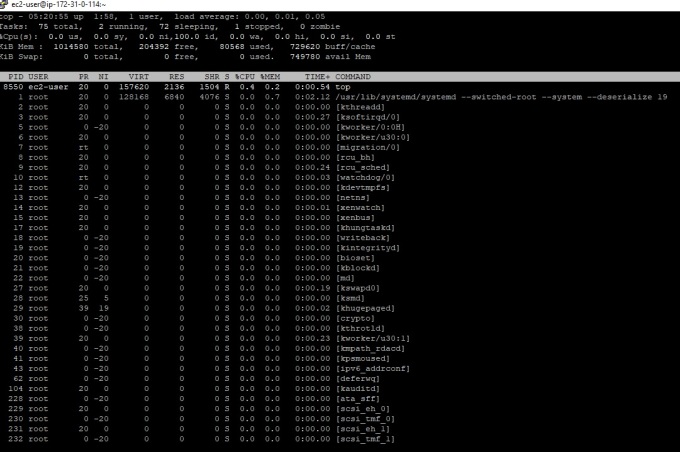
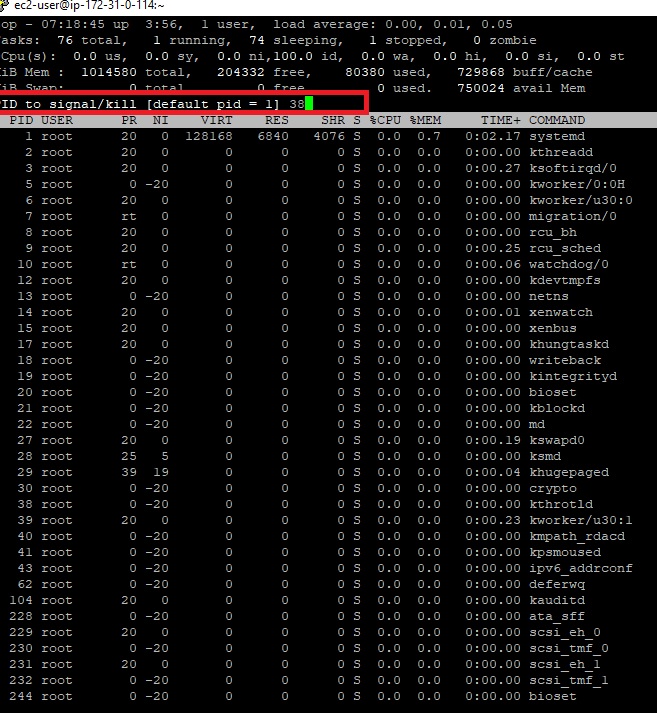
Press k [if you want to kill any running process]

# top -n 1 b > top-command-output.txt This command help you to save the output of the running process after executed top command

# cat top-command-output.txt [This command is view contains of the file]

9.jpg

#  Press K to kill a running process with the argument of K.

10.jpg

#press q to quit the window of the top command output.


Thank you 🙂

Troubleshooting SQL Server worst performing queries

In this blog, I will shortly discuss how to troubleshoot SQL Server worst performance queries.

In my case, I always use Dynamic Management views DMVs  sys.dm_exec_query_stats for troubleshooting worst queries performance. SQL server stores runtime statistics about cache execution plan in the DMVs and Dynamic Management function (DMFs).

Therefor, you can easily find out worst performing query in your SQL server using the following query: sys.dm_exec_query_stats.

To remember this, Every cache execution plan , SQL server stores details information about this execution plan perform at runtime, and tell you how much CPUs, and I/Os would be consumed by that query.

when you execute select * from sys.dm_exec_query_stats, for each eSQL server gives you the following information metric and for each metric 4 different columns with aggregation information :

  • Worker Time (columns …_worker_time)
  • Physical Reads (columns …_physical_reads)
  • Logical Writes (columns …_logical_writes)
  • Logical Reads (columns …_logical_reads)
  • SQLCLR Time (columns …_clr_time)
  • Elapsed Time (columns …_elapsed_time)
  • Row Count (columns …_rows)

Aggregation information: total value, last value, min value, max value

1

Now, you need to evaluate your SQL query performance base on performance bottleneck. Performance bottleneck can be CPU bound or I/O bound.

If your Performance bottleneck is CPU bound, you can evaluate your worst query performance using the following query in term of CPU consumption:

— Worst performing CPU bound queries– Worst performing CPU bound queries

GoSELECT TOP 5 st.text, qp.query_plan, qs.*FROM sys.dm_exec_query_stats qs

CROSS APPLY sys.dm_exec_sql_text(qs.plan_handle) st

CROSS APPLY sys.dm_exec_query_plan(qs.plan_handle) qp

ORDER BY total_worker_time DESC

2

–Worst performing I/O bound queries–Worst performing I/O bound queries

SELECT TOP 5 st.text, qp.query_plan, qs.*FROM sys.dm_exec_query_stats qs

CROSS APPLY sys.dm_exec_sql_text(qs.plan_handle) st

CROSS APPLY sys.dm_exec_query_plan(qs.plan_handle) qp

ORDER BY total_logical_reads DESC

3

If you click on query_plan, you can see execution plan for the specific worst query performer. 4.jpg

Now you can troubleshoot worst query and find out further more about how to get resolve the issues.

Note: SQL Server stores runtime statistics  about execution plan in the DMV sys.dm_exec_query_plan.

Thank you 🙂


Windows: Configure System Image Backup

In this tutorial, I am gonna discuss how you can configure your system image and files backup and restore them using windows built-in-utilities without third-party utility Tools.

Task lists:

  • Configure a System Image Backup in Windows 7, 8, or 10
  • Configure a system repair disc that you can use to start your computer and restore a backup image
  • Restore Personal File, How to configure File History Settings
  • Schedule of file saving and how long you want to keep saved versions

Features are: Windows built-in File History feature
Backup and Restore feature including Create a System Image image and a System Repair disc

File History feature gives you the facility to save a copy of your files to another location

A system image backup is a full snapshot of an entire hard drive. The benefit of a system image is that if a hard drive crashes, you can replace it, restore the image, and get back to your system where it was when the image was last captured. You don’t require to reinstall Windows or your applications.

Steps for the task:  Configure a System Image Backup in Windows 7, 8, or 10

Windows 7, 8, 10 have the same technique to create a system image backup. As I am a windows 10 user, I am going to show it in windows 10.

Step1: Go to your control panel and choose “Backup and Restore (Windows 7) or you can select File history

1.png

Step 2:  Now you need to click on “Create a system image”1

Step 3: Now you can see a new window and get a message why you need to save the backup and the options in where you can save your image backup.

  • If you want to save the backup on your pen drive or hard drive, select the first  option “On a hard disk”
  • 2nd option: “on One or more CD/DVDs” if you want to save the backup on CD/DVD disk
  • 3rd option: “On a network location” if you want to save the backup file in the different network location

In my case, I am using option 2 “On one or more DVDs”

2.jpg

Step 4: Click Next button after selecting your desired backup location.

Confirm your backup settings by clicking on “Start backup3.jpg

4

6.jpg

SQL database backup Strategy Plan

In this blog, I will discuss SQL database backup strategy plan

A Backup of a database has two types: Full and Differential

Full database backups represent the whole database at the time the backup finished. Differential database backups contain only changes made to the database since its most recent full database backup.

Manual Backup: In this section, I discuss how to take a manual back up of any specific database.

Step 1: Go to the Microsoft SQL Server Management Studio -> Click the database [you want to take backup] -> select Back Up 1.jpg

Step 2: Specify the source database and backup type: Full or Differential2

Step 3: You can see backup is progressing in the backup directory location 3.jpg

Step 4: You will receive a successful message after completing the backup job. 4.jpg

Automatic back scheduling using Microsoft SQL Management Studio -> Management -> Maintenance Plans

We can make back up the strategy using two features of Management plans

a) Maintenance plan wizard b. New Maintenance plan

1.jpg

a) Maintenance plan wizard:

Step 1: Click Management -> Maintenance plans-> Maintenance plan wizards -> Next1.jpg

Step 2:  Now you can set your plan properties. Give the name of the backup job, Run as It would be appeared automatically, now you need to schedule you back up the task: you can see a single schedule plan for entire tasks or separate schedule for your every task based on your requirement. Untitled1

Here, I am going to select Separate schedule for each task

2

3.jpg

Step 3: Configure backup plan for full database backup. Here you can configure backup plan for all databases or select the specific database you want to keep in your full database backup plan.

4.jpg

Step 4: Setup the scheduled time for full database backup. The backup will run automatically. Keep in mind that it would be better if you set backup schedule on an off-pick hour.

5.jpg

Step 5: You need to schedule the same configuration for differential database backups, transaction log, the mainanenac task

8.jpg

9.jpg

10

Define the location of log files1112

Execution the maintenance plan 1314

Check the backup is processing or not in the backup location such as disk, tab, URL15

You can check your log file16

Thank you 🙂

SQL database access permission to a User ( Error: The database is not accessible)

In this blog, I will discuss how to give SQL database access permission to a specific user.

3.jpg

Step 1: Login your SQL server as an Administrator user

2.jpg

Step 2: Click on the Username whom you want to give a specific database access permission

Click right button on username -> select Properties

4.jpg

Step 3: Here you can see a Login Properties dialog box

I will discuss here Server roles, User Mapping, and status 

Server roles: Here you can give a bunch of admin power to a user based on nature of user activities.

Example:

sysadmin: Members of the sysadmin fixed server role can perform any activity on the server.

serveradmin: Members of the serveradmin fixed server role can change server-wide configuration options and shut down the server.

securityadmin: Members of the securityadmin fixed server role manage logins and their properties. The can grant, revoke, deny server level permission and database level permission if they have permission to access database as well.

You can see more from : https://docs.microsoft.com/en-us/sql/relational-databases/security/authentication-access/server-level-roles

5.jpg

User Mapping: User Mapping is that grant a user to access a specific database based on nature of user activities

6.jpg

Here, I am giving permission user momo9 to access testdb database instance and allowing some specific roles such as db_ddladmin, db_datawriter, db_datareader etc.

You can set your user permission based on what activities that user wants to do on that specific database. More on: https://docs.microsoft.com/en-us/sql/relational-databases/security/authentication-access/database-level-roles

6.jpg

Step 4: Status

here you can see permission to database permission “Grant” or “Deny” and Login “Enable ” or Disable”7.jpg

Step 5: As I have given momo9 user admin power. That specific user can now create a table, insert the value and execute select statement without any error.8.jpg

9.jpg


permissions-of-database-roles

Source: https://docs.microsoft.com/


Thank you 🙂