
An aggregate is a physical storage. It is made up of one or more raid groups of disks.Raid groups are protected sets of disks. Consisting of 1 or 2 parity, and 1 or more data disks. ***RAID – Redundant Array of Inexpensive Disks or Redundant Array of Independent Disks.
It is raw space in the storage system. Suppose, When You buy a hard drive, you get it without partition. You need to partition your hard drives before use it, we called it raw space. Aggregate is kind of hard drive without partition. We usually aggregate a bunch of individual disk into aggregates but aggregate doesn’t hold any data.
NetApp Supports SATA, SAS disk drives or Fibre Channel disk drives. For instance, If I do RaidDP configuration in the default setup with 16 disk raid group consider FC/SAS disks. That means, If I create 16 disks in aggregate = I raid group. 32 disk in aggregate = 2 Raid group. Raid groups can be adjusted in size. 16 is the default disk for the FC/SAS but you can start from 3 to 28 disks to make a raid group. Remember, we do not build a raid group. Data ONTAP built the Raid group based on the default Raid group size. Multiple RAID groups make an “Aggregate”. Data ONTAP operating system set up “Flexible volumes” with aggregates for store data that end users can access.
The tasks for the module 3:
- Run the Storage configuration wizard
- Use NetApp OnCommand system manager to Create a 64-bit Aggregate
- Use the CLI to Create a 64-bit Aggregate
- Cause a disk to Fail
- Add Disks to an aggregate
- Create a flexible volume by using NetApp System Manager and Resize a volume
- Create qtrees and Delete qtrees
- Destroy a volume
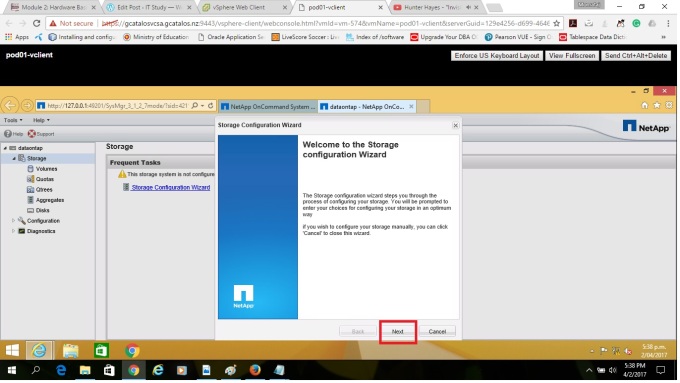
Steps for the task: Run the Storage configuration wizard
Step1: Before configuration of aggregate, and volume, We need to configure Storage for access storage system. Go to “Storage” and Click “Storage Configuration Wizard“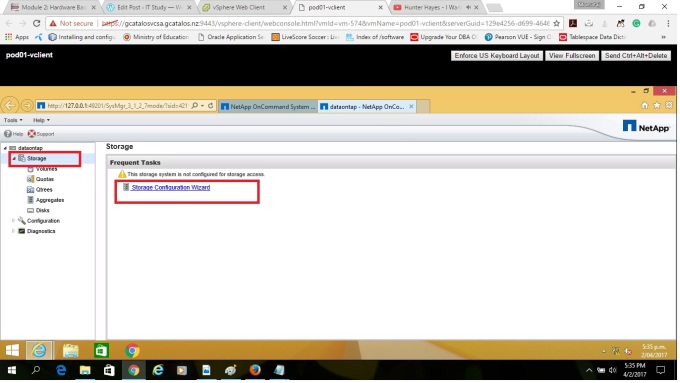
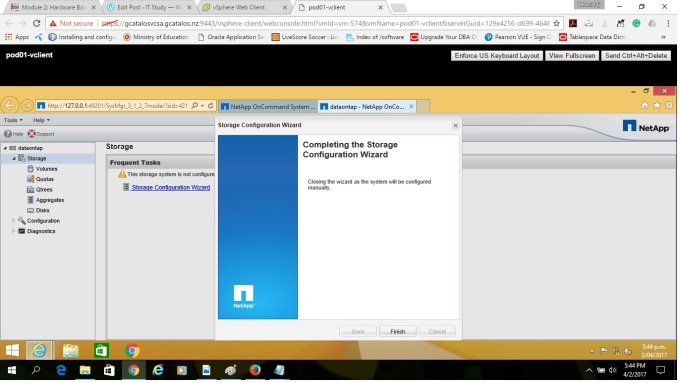
Step 2: On the “Configure Aggregate” page, select “Manually Create Aggregates” because we don’t want to create an aggregate with all of the remaining disks. We will do it manually based on our storage requirement.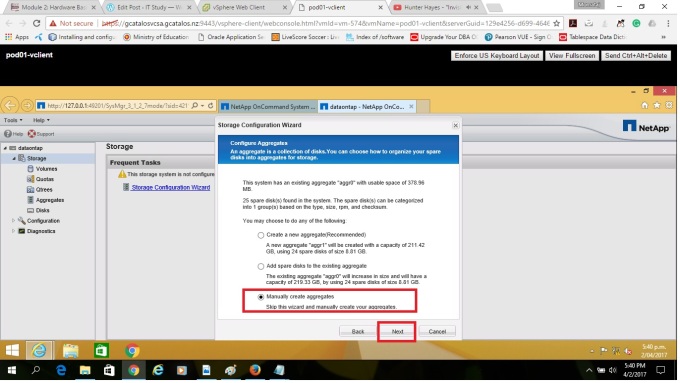
Steps for the task: Use NetApp OnCommand system manager to Create a 64-bit Aggregate
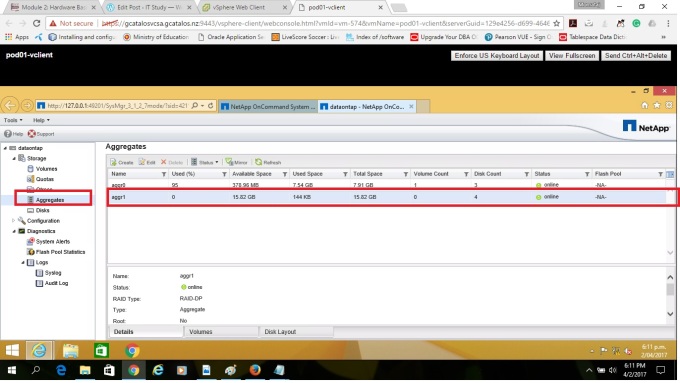
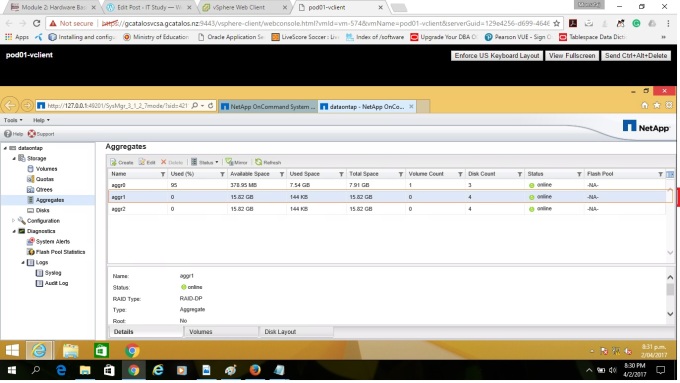
Step 1: Now you will create an aggregate. As you know, an aggregate is a collection of disks. If you go to your aggregates panel, You will see an aggregate “Aggro” is already there by default.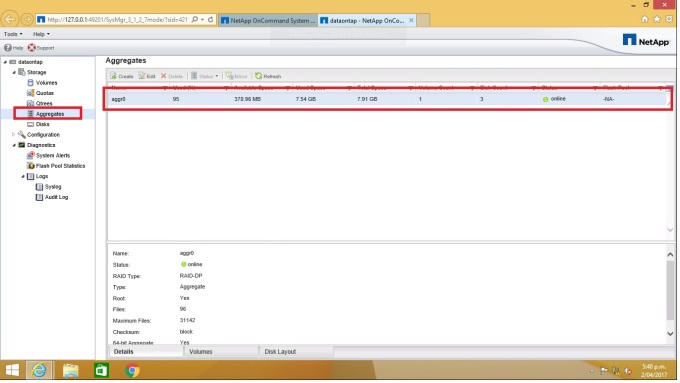
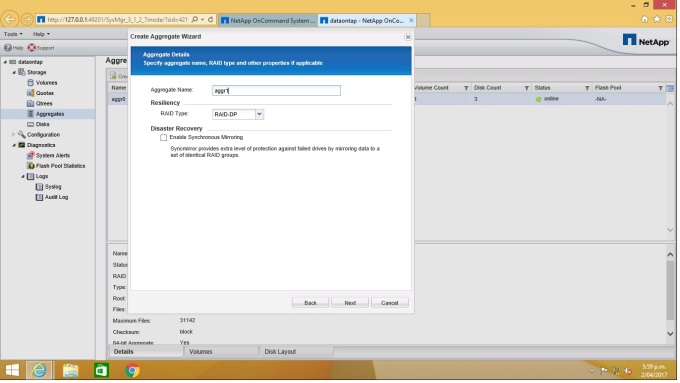
Step2: Click “Create”. You will see a “Create Aggregate” Wizard will appear. Click “Next” for the further setting.
Step3: On the aggregate details page, aggregate Name = aggr1 and retain the default values for RAID Type = RAID-DP and then click Next.
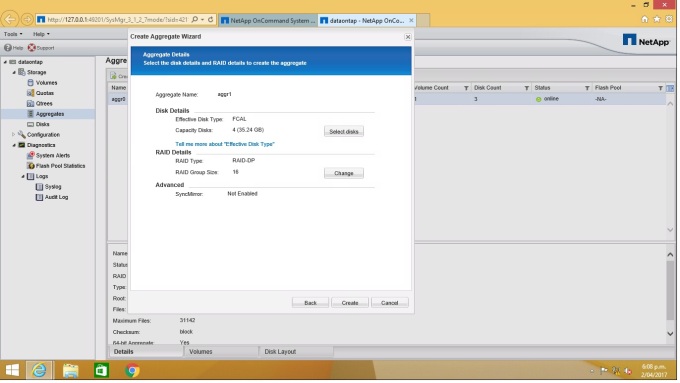
Step4: Click “Select Disks” and provide the information that how many disks you want to allocate to create an aggregate from RAID group size which is 16 by default on “Change Disk Selection” Wizard. As you see, Disk type is FCAL and I chose “Number of the capacity disk to use”= 4. Click “Save and Close” and then Click “Create”. An aggregate will be created named “Aggr1”.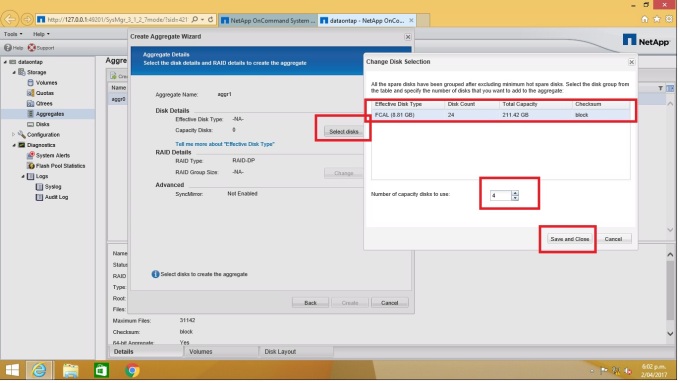
Steps for the task: Use the CLI to Create a 64-bit Aggregate
Previously I created an aggregate “Aggr1” by using NetApp OnCommand Manager interface system. In this task, I will create another aggregate “aggr2” by using command line interface (CLI).
Step 1: Login Storage system through PuTTY. Before creating a new aggregate, you need to check current status. Execute the command “Aggr Status“. It will show the status of the available aggregate at this moment.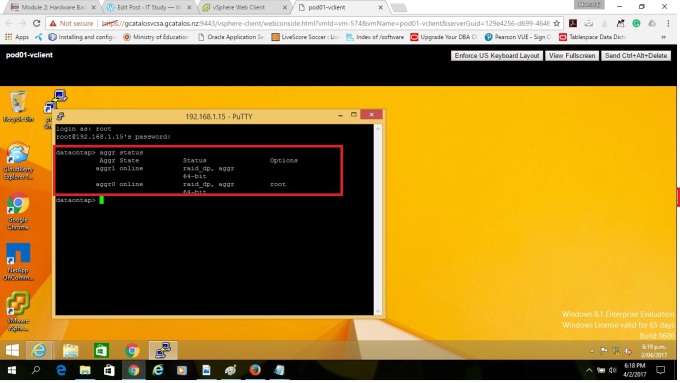
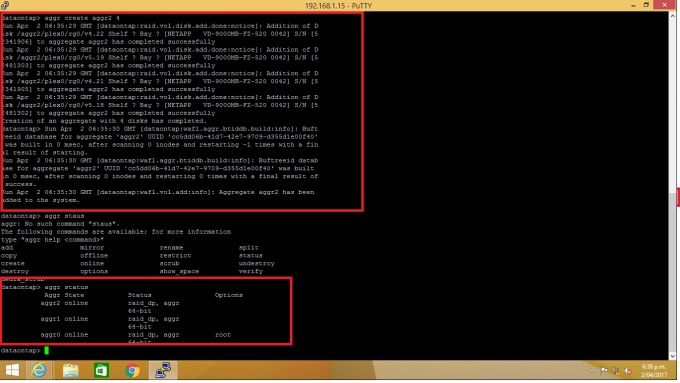
Step 2: Now you need to create a 64-bit aggregate called aggr2 with four disks with the following command: “aggr create aggr2 4” in the CLI instead of ‘aggr create aggr2–B 64 4;
Note: -B 64 parameter specifies the indirect block format that the aggregate can have. The values are 32-bit and 64-bit. If you specify 64-bit, then you can create aggregates that can be larger than 16TB. Remember, The default value is 64-bit. By default, Data ONTAP 7-Mode creates 64-bit aggregates, Therefore, You don’t need to mention -B when you create 64 -bits aggregate. If you want to create a 32-bit aggregate, use the option –B 32 in the command.
aggr create aggr2 4 [ aggr create {name of aggr} {number of disk capacity to use} ]

Steps for the task: Cause a disk to Fail
In this task, I will try to fail a disk and figure out the impact of disk failure.
Step 1: Before making disk fail, you need to check your aggregate status of aggr1 on the storage system console, and system configuration details by the following commands:
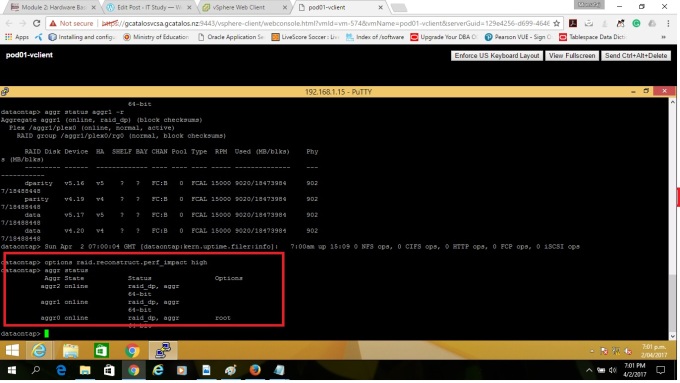
aggr status aggr1 –r
sysconfig –r
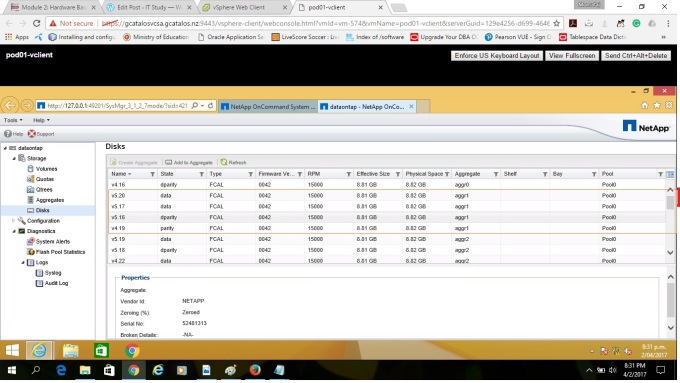
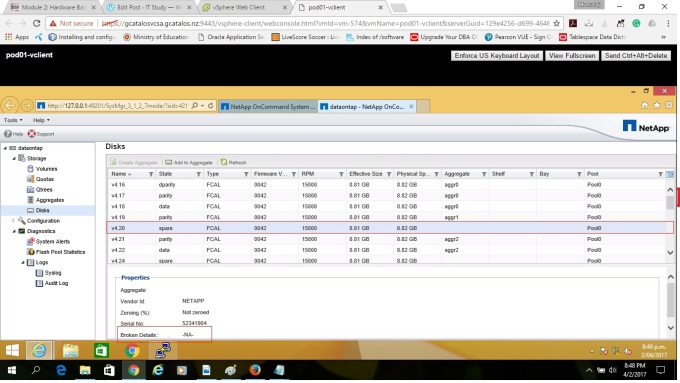
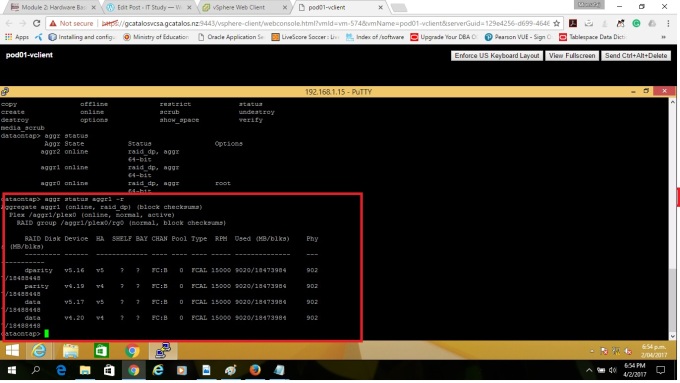 Record the ID of a data disk in aggr1: I have two parity disk (v5.16, v4.19) and two data disk (v5.17, v4.20)
_______________________
List any failed disks: none
Apply the following command to the storage system console and verify the aggregate status: options raid.reconstruct.perf_impact high and aggr status
Note: options raid.reconstruct.perf_impact high means that the storage system uses most of the system resources available for RAID data reconstruction; this setting can heavily affect storage system performance, but reconstruction finishes sooner, reducing the time that the RAID group is in degraded mode.
Step 2: In this step, I will purposely fail a disk to view the result of the impact of disk failure.
disk fail v4.20
Note: The following message will be apear after disk fail.
“If the disk fail command is used without options, the disk is first marked as “prefailed.” If an appropriate spare is available, it is selected for Rapid RAID Recovery. In that process, the prefailed disk is copied to the spare. At the end of the copy process, the prefailed disk is removed from the RAID configuration. The filer then spins the disk down so that it can be removed from the shelf.
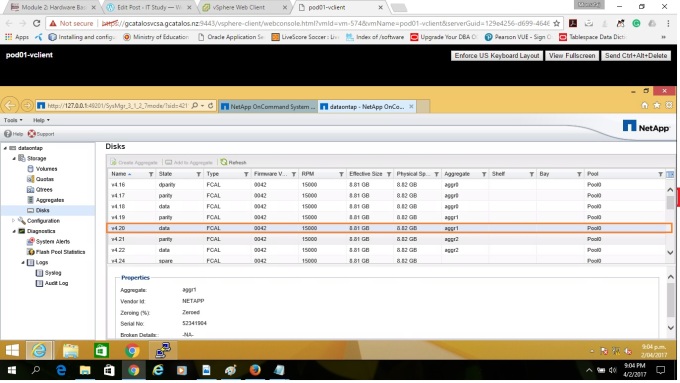
The Result of disk fails v4.20: After making a disk fail of v4.20 device ID, automatically all data has been started to copy from v4.20 to v5.20. That means, If any disk gets fail, System will automatically take control and copy the data to another disk from broken disk without any interrupt of work.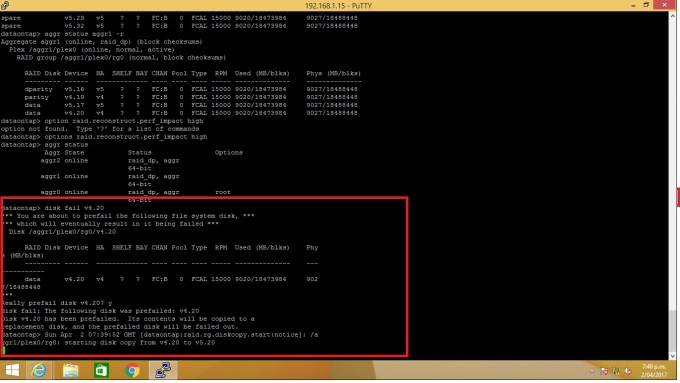
You can see the percentage of copy status by the command of ” aggr status aggr1 -r“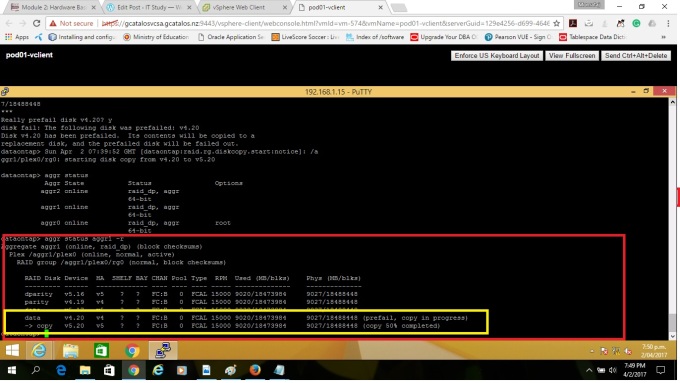
In the following snapshot, you can see v4.20 has been replaced by v5.20 in the aggregate agr1. 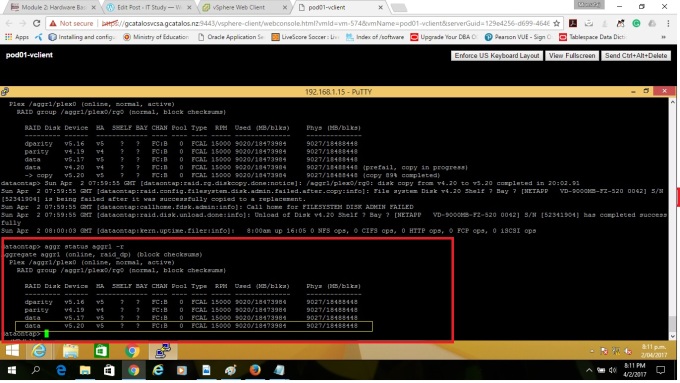
The disk that is being removed is marked as “broken,” so that if it remains in the disk shelf, it will not be used by the filer as a spare disk. If the disk is moved to another filer, that filer will use it as a spare.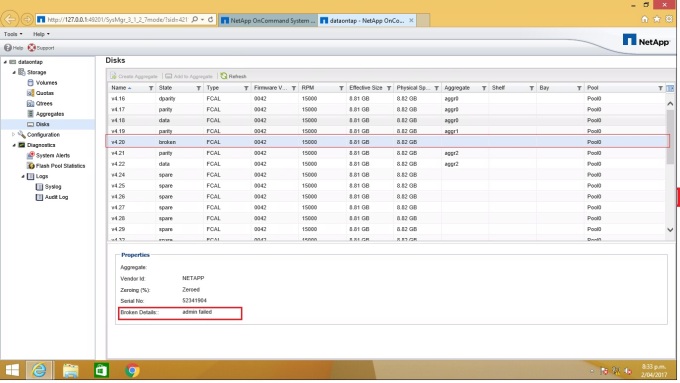
****Compare the information provided by the vol status command versus the sysconfig
command.
Vol status provides the information regarding volume state, status and options
Sysconfig provides the information about system information such as version, system id, serial number etc.
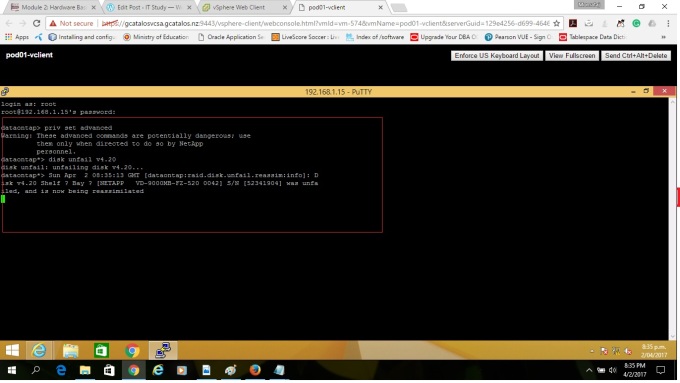
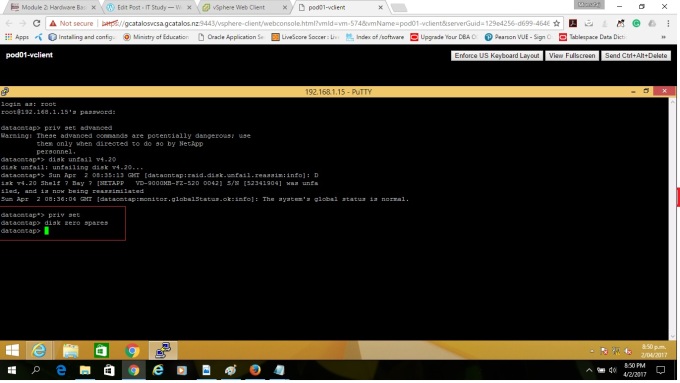
Step3: After reconstruction is complete, you will able make failed disk to available for use by the following commands.
> Priv set advanced
*>disk unfail device_id_from_step_1
> priv set
disk zero spares
Steps for the task: Add Disks to an aggregate
Step1: In the aggregate “Aggr1” has four disks including 2 parity and 2 data disks. Now you need to add another disk to aggregates. 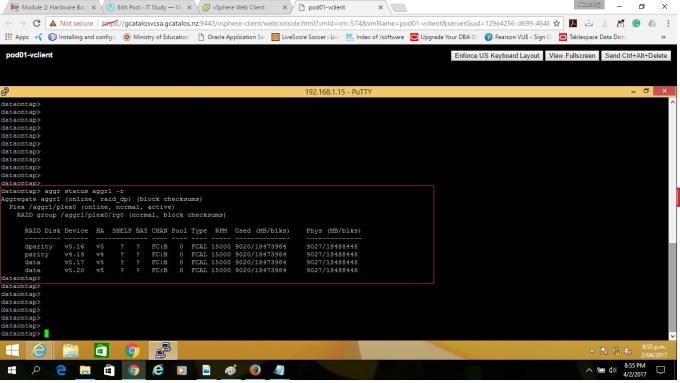
Step 2: To add disk in the aggregate, Go to the “disk panel”, Select the first available “Spare” disk and click right button of the mouse and “Add to aggregate“. In my case, I added v4.20 in aggr1.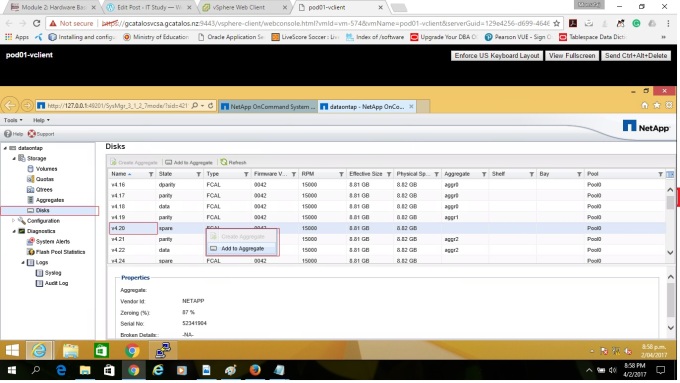
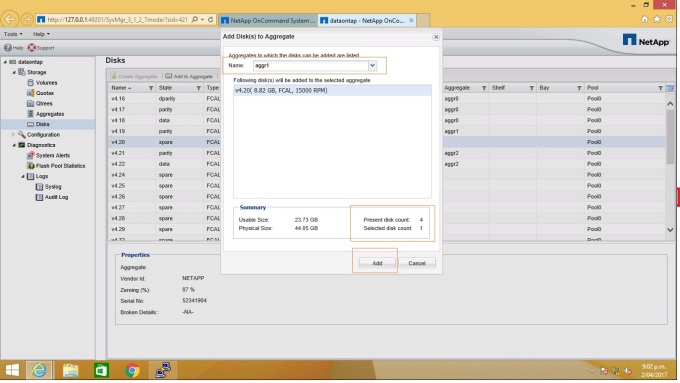
Now you can see, One disk is added with aggregate “aggr1”. The total number of disks in the aggr1 is 5, Previously It was 4.
Steps for the task: Create a flexible volume by using NetApp System Manager and Resize a volume
In this task, I will create a volume in the storage management system via NetApp System manager interface and I will also add that volume into the aggregate “aggr1”. Then I will demonstrate how to resize the volume.
Note: Volumes are accessed via NAS protocols, CIFS/NFS
LUNS are accessed via SAN protocols, iSCSI/FCP/FCoE
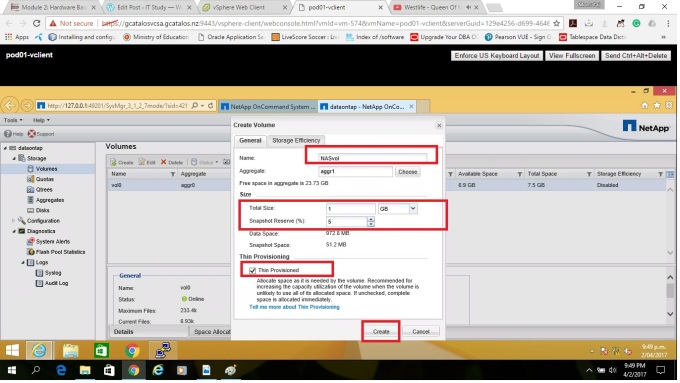
Step1: Go to your NetApp OnCommand System manager, Select Storage -> Volume from the left pane. Click “Create“.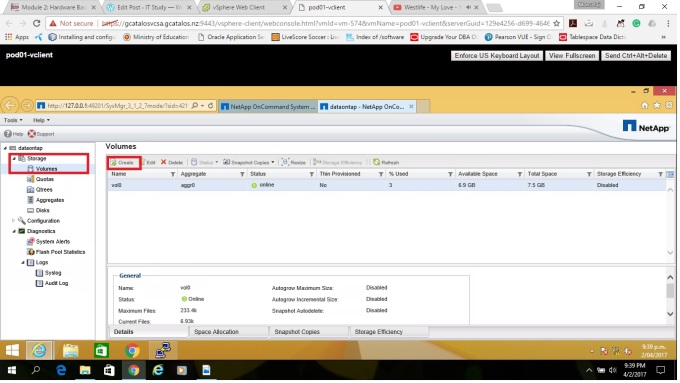
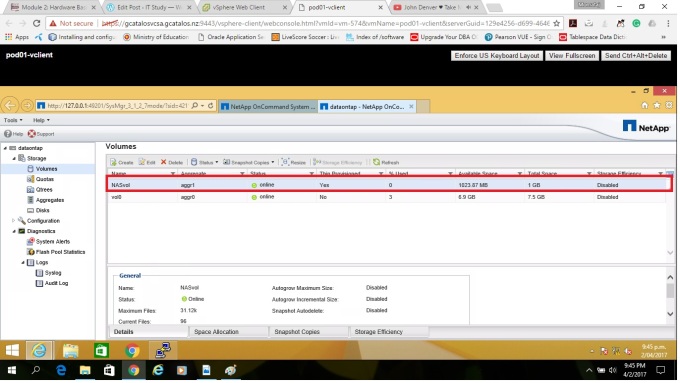
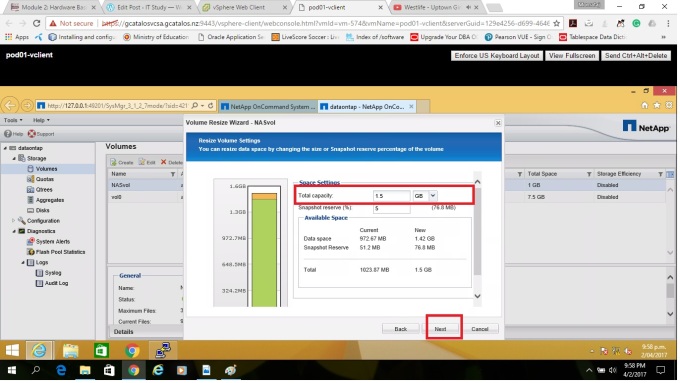
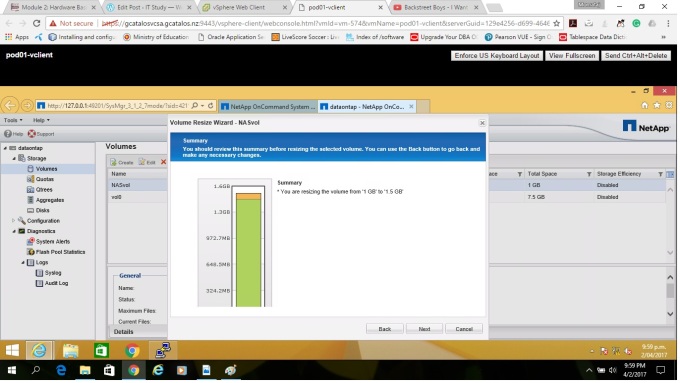
Step 2: Now you will perform resize the newly created NAS Volume. Go to the Storage -> volumes pane, Select “NASvol” and click on “Resize” from the menu bar. The volume Resize wizard appears. Then Click “Next“

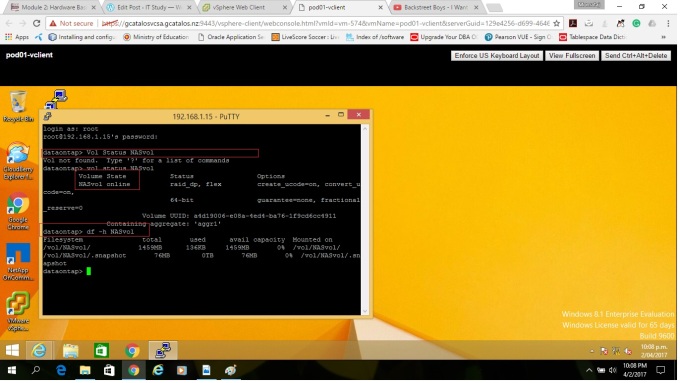
Step 3: You can also resize your NAS volume through command prompt. Go to the CL1 via PuTTY connection. You should check the status of the NAS volume before resizing its capacity.
vol status NASvol
df –h NASvol [The command df stands for “disk filesystem”. With the -h option (df -h) it shows the disk space ]
After resizing your NASvol to 100g, You will see different status if you check again. The volume size has been increased.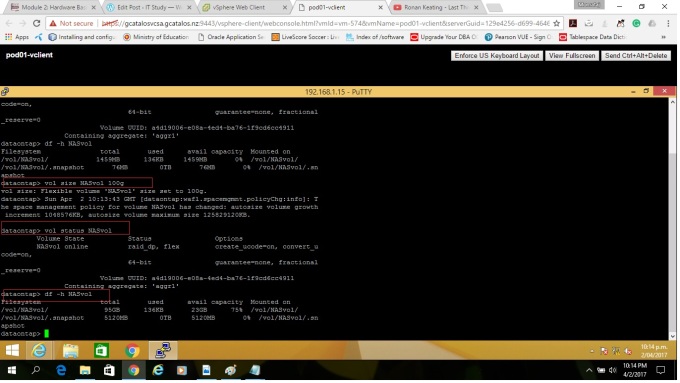 Steps for the task: Create qtrees and Delete qtrees
In this task, I will create the qtrees through GUI and CLI interface. And I will show how to delete qtrees.
The qtrees has been used for two reasons mainly: Quotation and Qtree snapvault and snapmirror.
When you create a volume, a special qtree referred to as “qtree0”, that means a default qtree is created automatically for the volume.It represents all of the data stored in a volume that isn’t contained in a qtree.The qtree status indicates read-only for data protection and load sharing volumes. Snapmirrored and Snapvaulted qtrees are not supported.
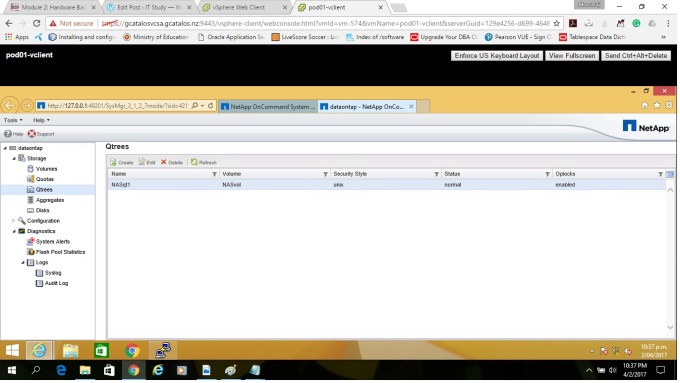
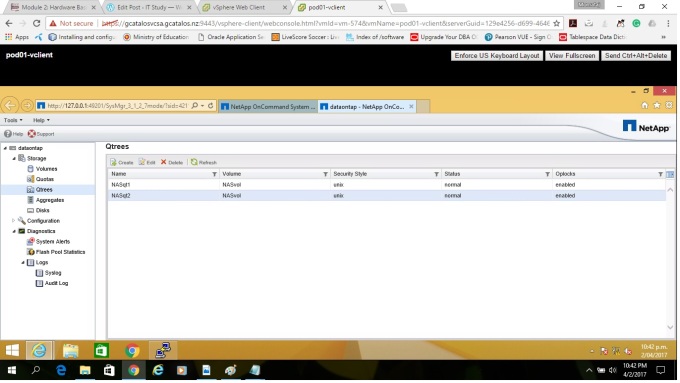
Step1: Go to your OnCOmmand System Manager, Dataontap->Storage ->Qtrees, Click Create. A create Qtree wizard appears. Provide the information such as name, the volume which you want to tag with Qtree and security style. Click “Create. A Qtree will be created in a minute for NASvol.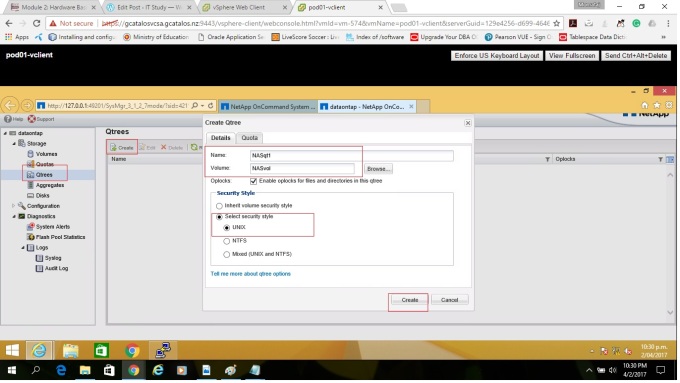
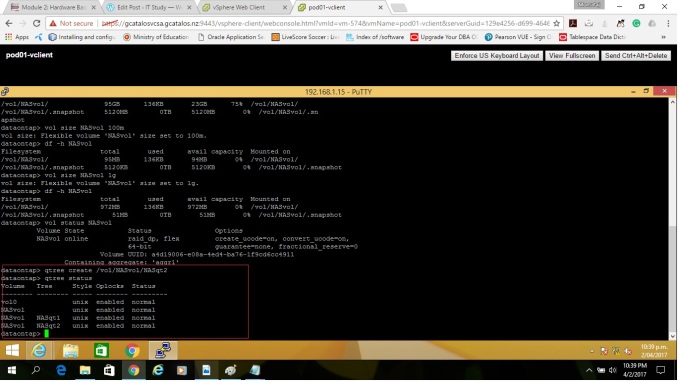
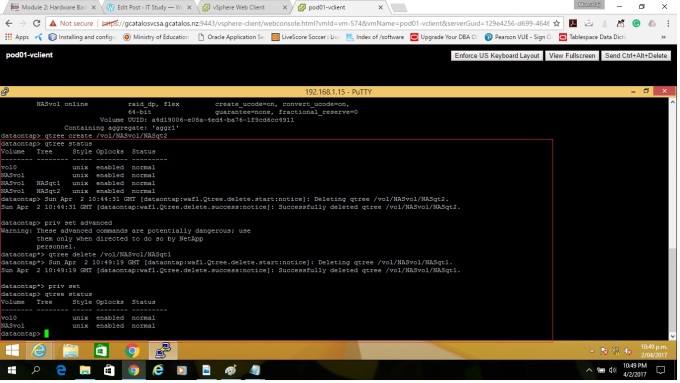
Step2: Now you will create another Qtrees via CLI in NASvol called NASqt2.
> qtree create /vol/NASvol/NASqt2
> qtree status
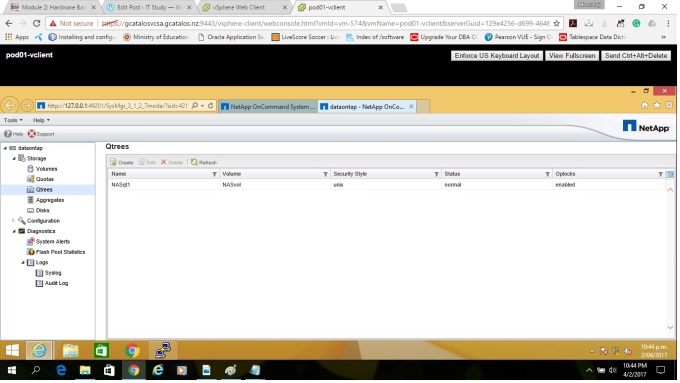
Step3: Deleting Qtree from OnCommand System Manager interface. Now we will delete NASqt2. Select “Delete” from the “qtree” pane. 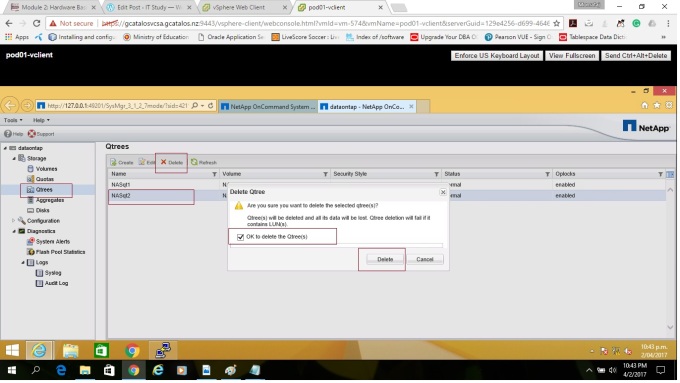
Step 4: Now I will show how to delete qtree from the CLI, change the interface to the advanced privilege set.
priv set advanced
qtree delete /vol/NASvol/NASqt1
priv set
qtree status
Steps for the task: Destroy a volume
Sometimes We need to delete a volume that may be we created accidently or without a plan or may be no longer required. In this task, I will show how to delete a volume.
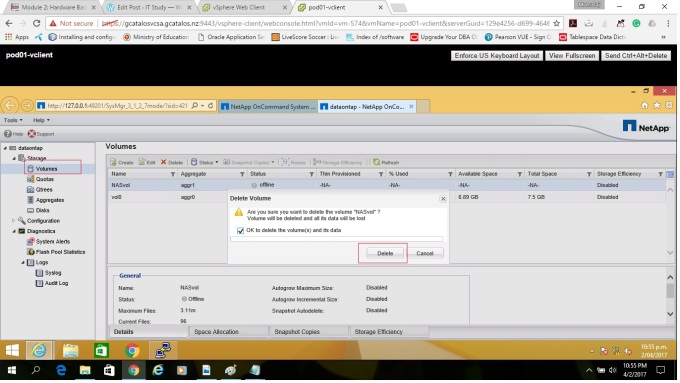
Step1: Click Storage -> Volume. And select the status and make it offline before delete. Remember: Without making a volume offline, it is not a good practice to delete a volume. It may effect on the whole system. 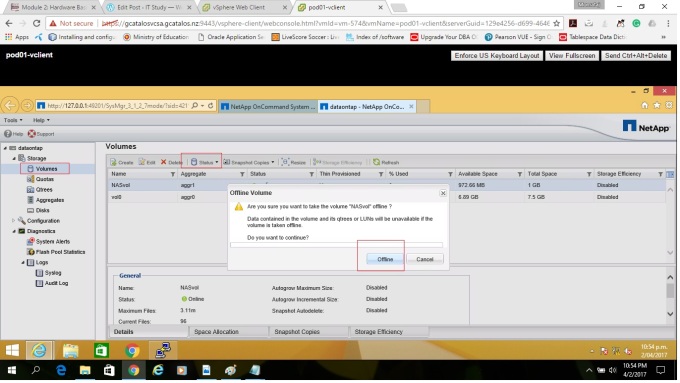
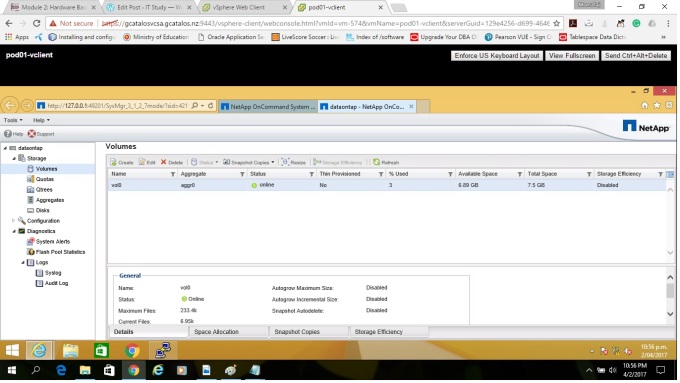
I hope now you understand how to create, delete and manage Storage system, Aggregate, volume and qtree.
The next module-4, I will discuss “Getting Started with Basic Network Administration”
Thank you 🙂
.
