
In this lab, I am going to show how to perform migration of Virtual Machine use vSphere vMotion and vSphere Storage vMotion
Migration of Virtual machine: You can move a Virtual machine from one host/datastore to another host/datastore the following way:
- Cold Migration: Migration a Virtual machine when is powered off
- Suspended VM Migration: You can migrate a suspended VM to a different host or datastore
- VMware vSphere vMotion: You can move a Virtual machine from one host/datastore to another host/datastore when VM is powered On. VMware vSphere vMotion mainly uses to balance server load, for planned maintenance or Upgrade to Physical Servers
- VMware vSphere Storage vMotion: It provides the provision to migrate a virtual machine to a new datastore while it is powered On.
The tasks list for the lab 14:
- Migrate Virtual Machine Files with vSphere Storage vMotion
- Create a Virtual Switch and a VMKernel Port Group for vSphere vMotion Migration
- Verify That ESXi host Meets vSphere vMotion Requirements
- Verify That Virtual Machines Meet vSphere vMotion Requirements
- Perform a vSphere vMotion Migration of a Virtual Machine on a Shared Datastore
- Perform a Cross-Host vSphere Storage vMotion Migration to a Datastore
Prerequisites:
- Log in the VMware vSphere web client portal: https://vCenter Server Appliance Name.domainname:9443/vshpere-client/# or VMware vSphere Client via root user and password.
Steps for the task: Migrate Virtual Machine Files with vSphere Storage vMotion
When you need to move a virtual machine’s files to another datastore for disk load balance or transition to another storage array, vSphere Storage vMotion is the best option. Though the vSphere Storage vMotion, you can migrate a virtual machine and its disk files from one datastore to another while VM is running state.
vSphere Storage vMotion copying all blocks to the destination disk even blocks are changed after they are copied, the blocks are automatically synchronised from the source disk to destination disk via the mirror driver.
Step1: Go to the vCenter -> Virtual Machines
Step 2: In this step, I will migrate one of my Virtual machines from datastore “PrivateVMFS-0304 to PrivateVMFS02-5”.
Go to the “Related Objects”. You can check the Datastore of your VM machine.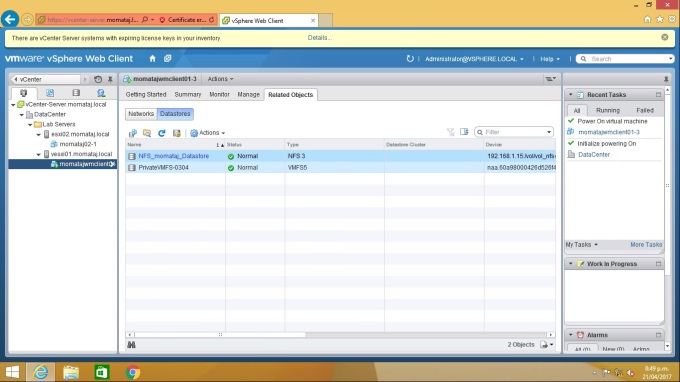

Step 3: Right Click your VM which VM datastore you want to move. Click “Migrate” 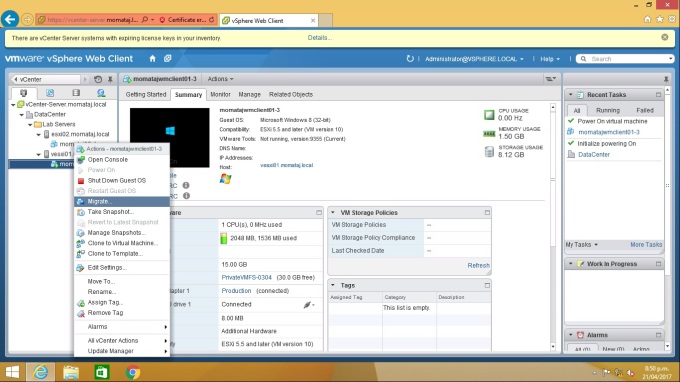
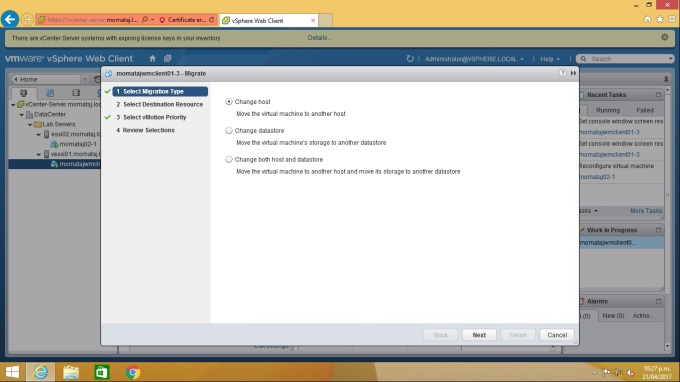
Step 4: Now you need to perform the following action that I showed on the screenshot.
Option 1: Select the Migrate Type: Change Datastore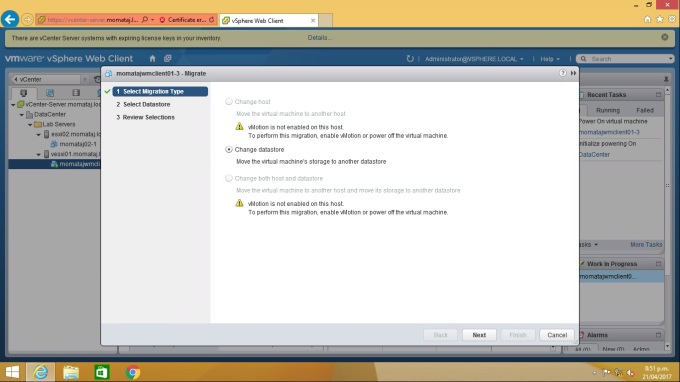
Option 2: Select the Datastore: Your destination datastore. In my case: PrivateVMFS02-5. Select Virtual disk format: Same format as the source , Or you can change the Virtual disk format.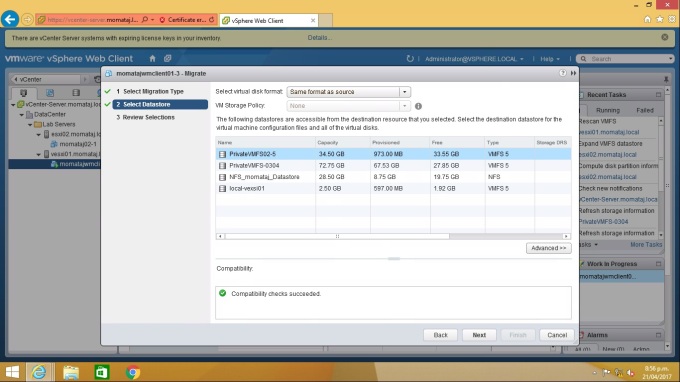
Option 3: Review Selections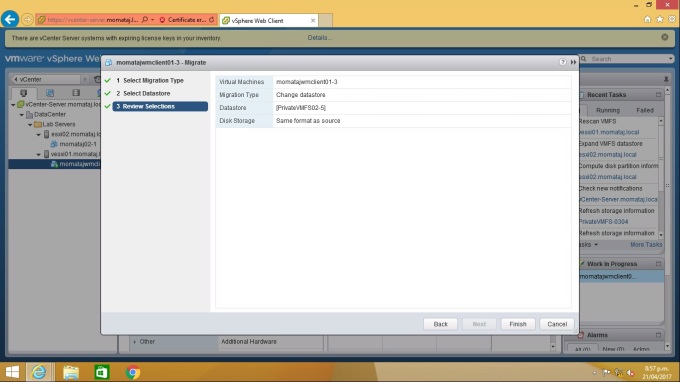
Now you can monitor the progress in the Recent Tasks panel.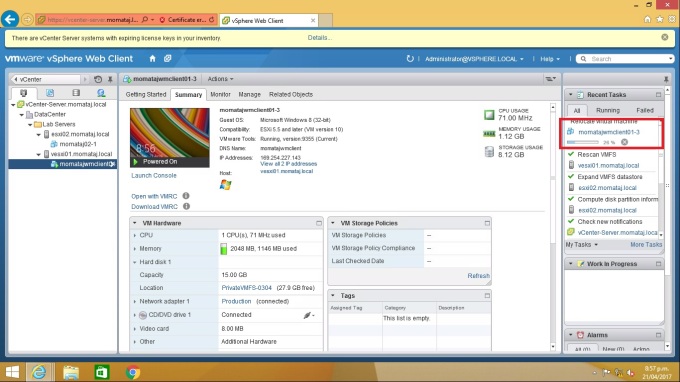
You can see now Migration of Datastore has been happened while your machine is powered.
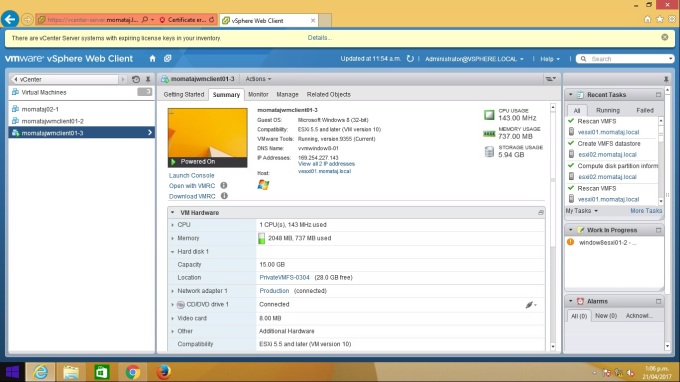
Verification of dataStore Change: Go to the Summary of your VM. Check the VM Hardware location you can see datastore location changed. 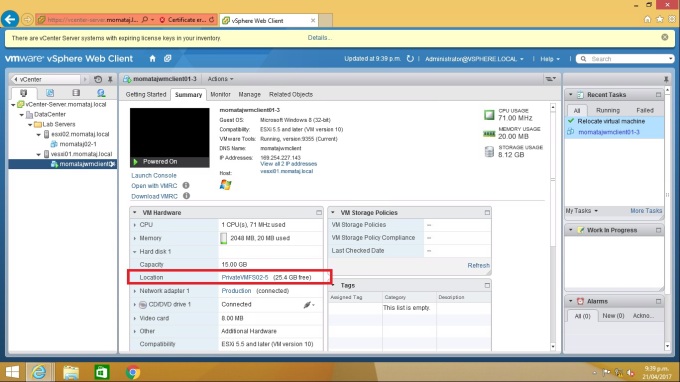
You can verify it from “Related Objects -> Datastores“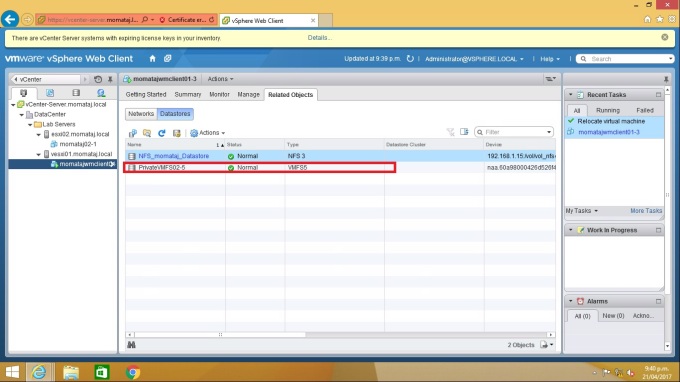
Steps for the task: Create a Virtual Switch and a VMKernal port Group for vSphere vMotion Migration
In this task, I am going to create a virtual switch with a VMkernal port that will be used in VMware vSphere vMotion Migrations.
Step 1: Go to the Home->vCenter->Hosts and Clusters-> DataCenter-> Lab Servers -> ESXi host 1 in the inventory -> Manage -> Networking.
Click on the Virtual Switches -> Add host Networking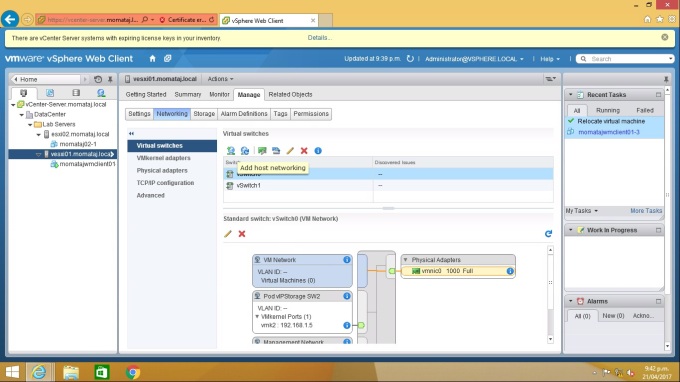
Step 2: Now you will get an Add Networking wizard. You need to perform the following action that I showed on the screenshot for creating a new Virtual Switch with a VM kernel Port Group
Option 1: Select Connection type: VMKernel Network Adapter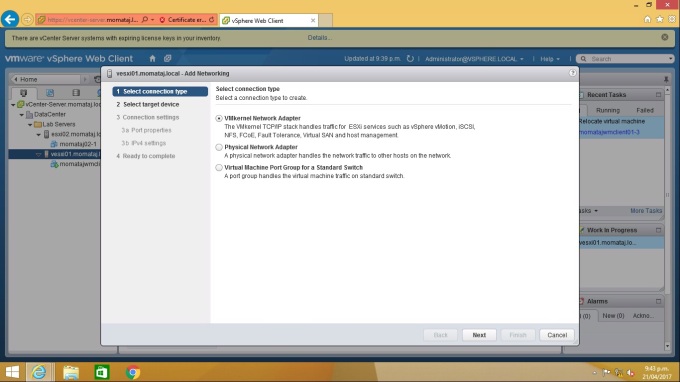
Option 2: Select the target device: New Standard Switch and Click “Next”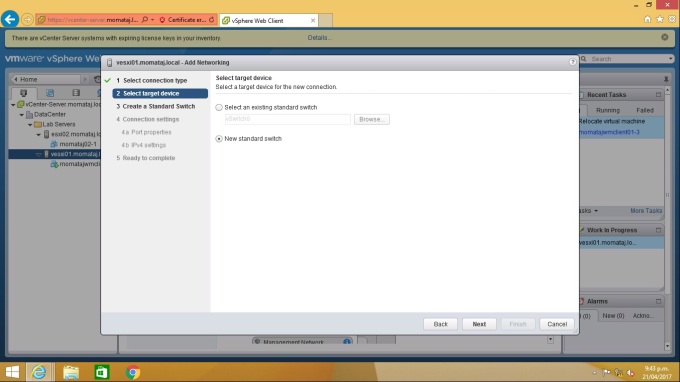
Option 3: Create a standard Switch: Click on the (+) sign and add the adapter.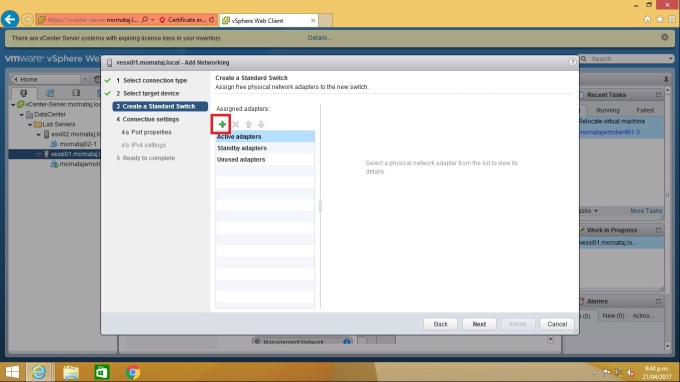
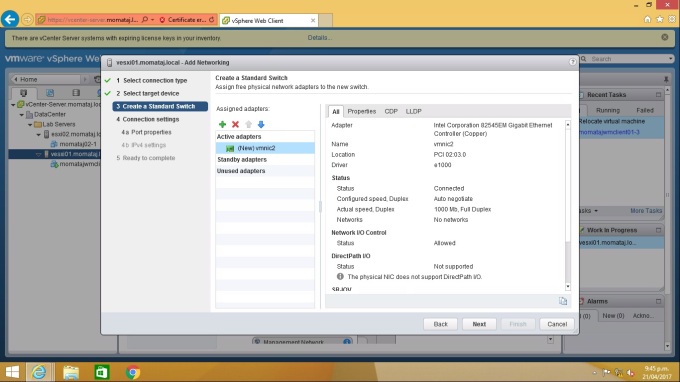
I chose Active adapter Switch2 vmnic 2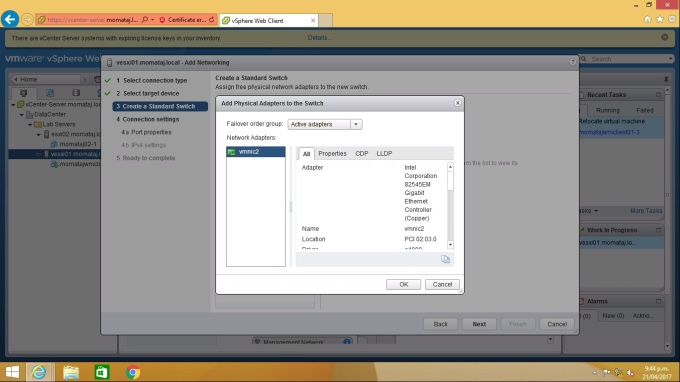
Option 4: Connection setting
4a. Port Properties: Network label:vMotion
IP setting: IPV4, Enable services: vMotion traffic under the Available services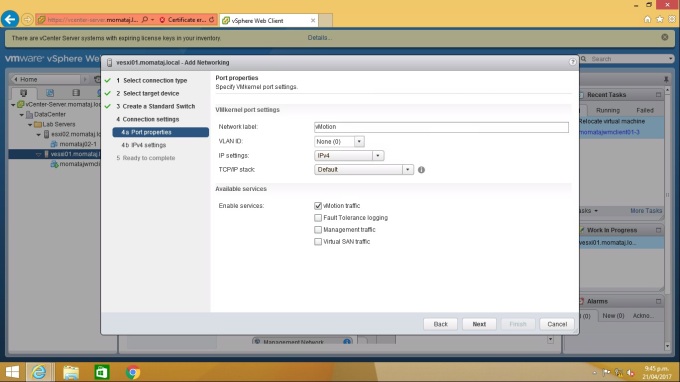
4b. IPv4 Setting: Use Static IPv4 Settings and provide the subnet mask. Make sure your default gateway for IPV4 is correct. If you are not sure, check your host1 vKernal default route IP.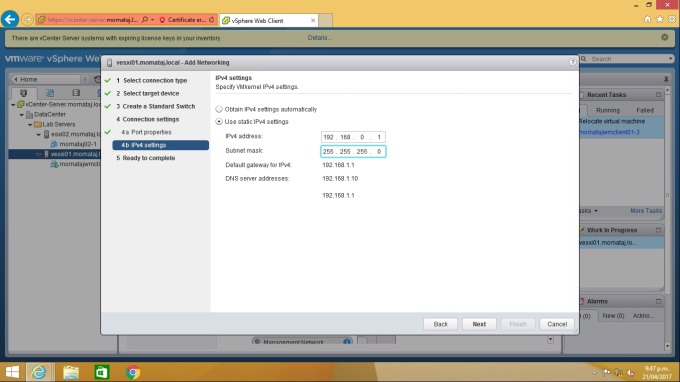
Review you whole setting once again before Finish.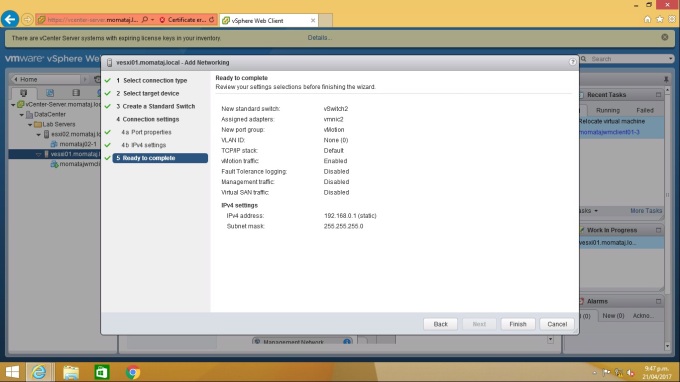
Now verify the setting from Manage-> Networking -> Virtual Switches. In my case, It is vSwitch2. You should check your own vSwitch.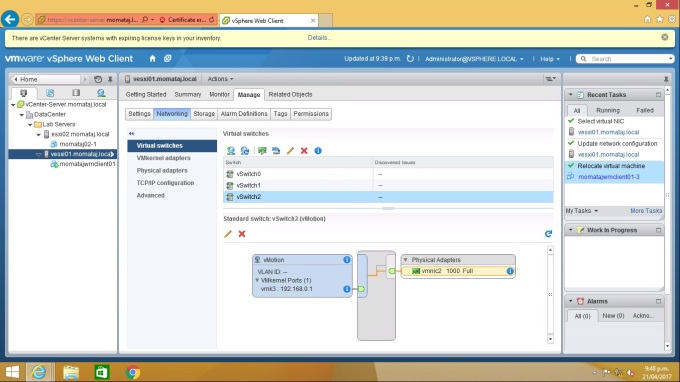
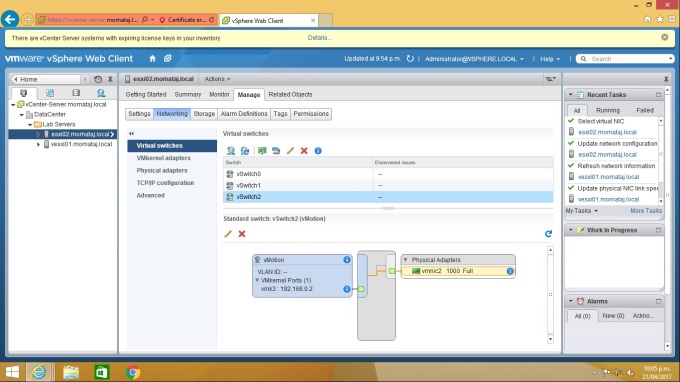
Repeat the same steps for the ESXi host 2:
Steps for the task: Verify that ESXi host Meets vSphere vMotion Requirements
Step 1: Select Home ->vCenter -> Hosts and Clusters -> ESXi host 1. Click Summary Tab.
Verify the processor type information that the CPU’s are compatible
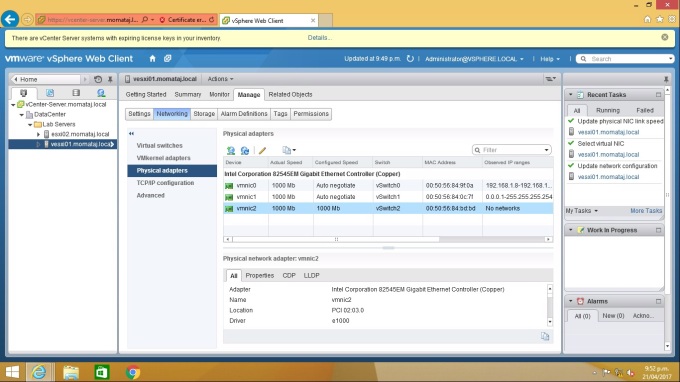
Step 2: Click on the ESXi host 1 manage tab. Go to the Physical Adapter and vmnic2. Verify that the vSphere vMotion port group meet the speed limit: full duplex of 1000MB, Full Duplex. If It doesn’t, change the Configure speed Full Duplex and Select 1000MB, Full Duplex.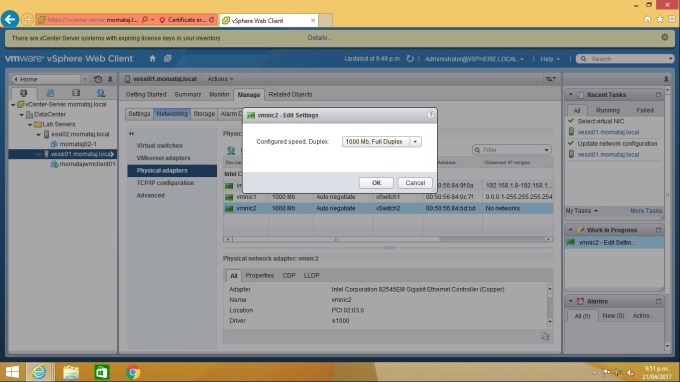
Check the VMkernel adapters: Select vSwtich 2 and verify that vSphere vMotion Port group exists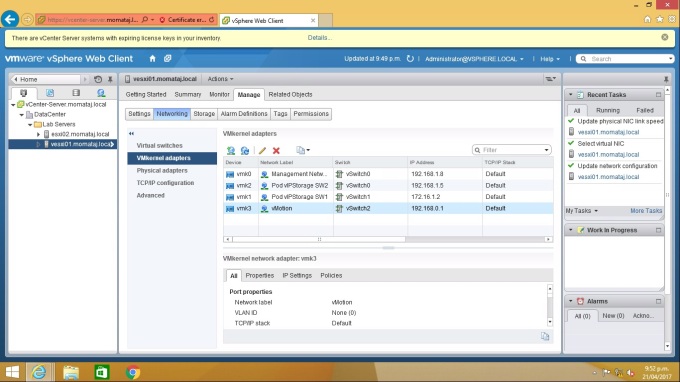
Step 3: Verification that both ESXi hosts have access to the same shared datastores.
Go to the Home ->vCenter->Storage->Datacenter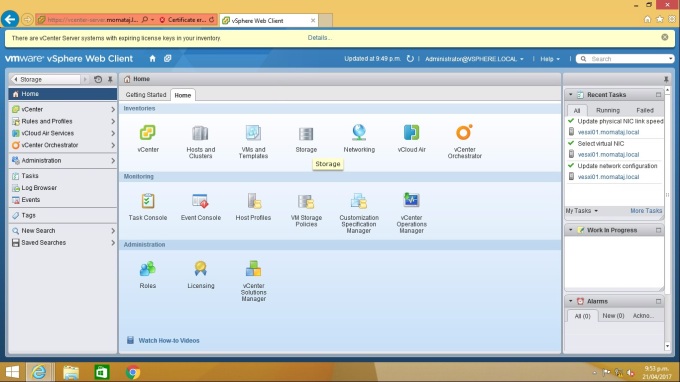
Go to the manage-> Settings on the manage tab. Select your datastore and click on the connectivity and multipathing. Verify that your both hosts are displaying in the table.
In my case, you can see on the screenshot, my both hosts is displayed in the table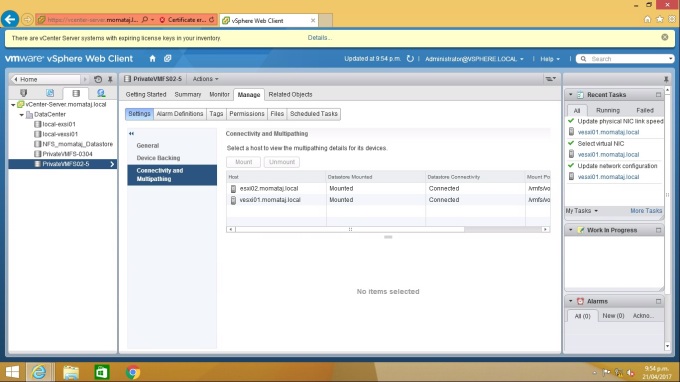
If you have more than one datastores, check all of them are shared with both hosts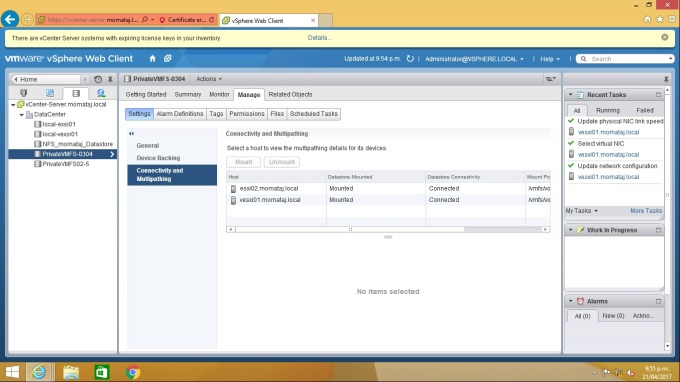
Steps for the task: Verify that virtual machines Meet vSphere vMotion Requirements
In this task, I will show how to check a VM settings meet vSphere vMotion requirements
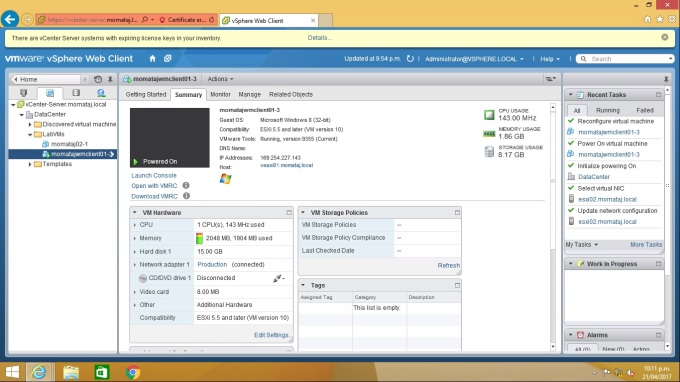
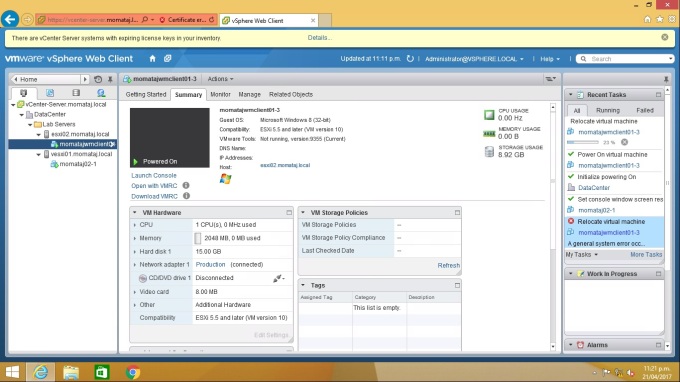
Step 1: Go to the Home ->vCenter -> VMs and Templates. In the “Lab VMs” folder. Right-click on one of your Virtual machine. Click “Summary”. In the VM Hardware Panel, Click “Edit Setting”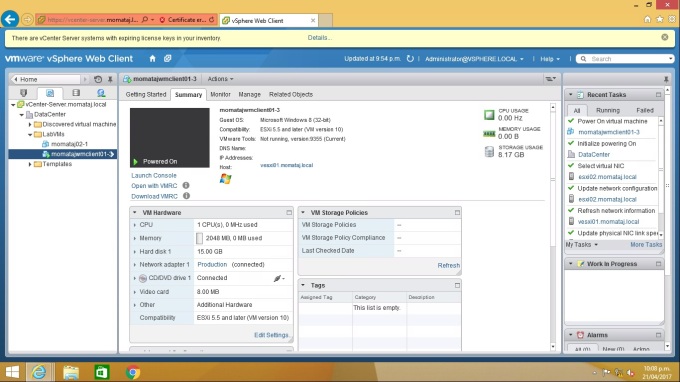
or Right Click on the VM and Select “Edit Setting“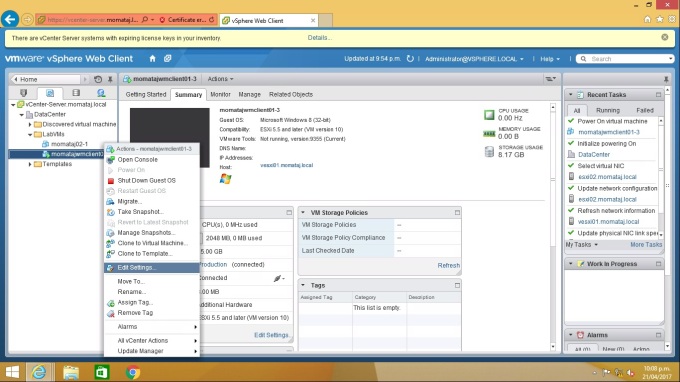
If your CD/DVD Drive 1 is connected with the local device and holding an image file. You need to change it.
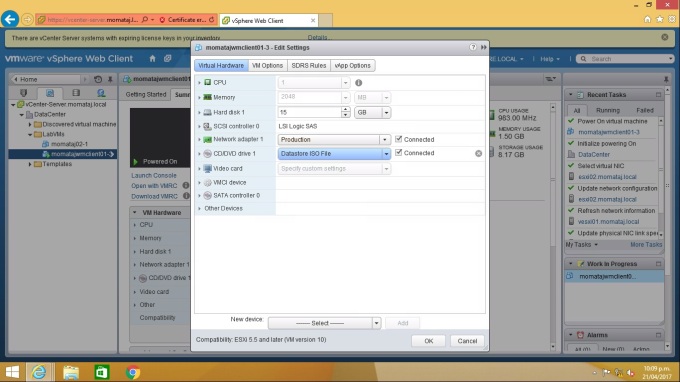
Select “Client Device” in the CD/DVD section.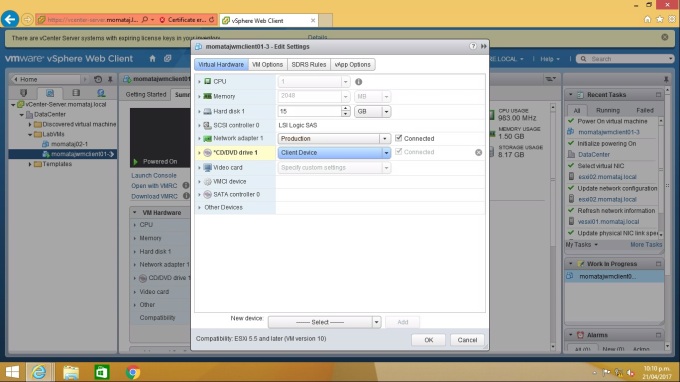
Step 2: Verify that CPU affinity is not set. If you see any number on the Schedule affinity, delete the number. 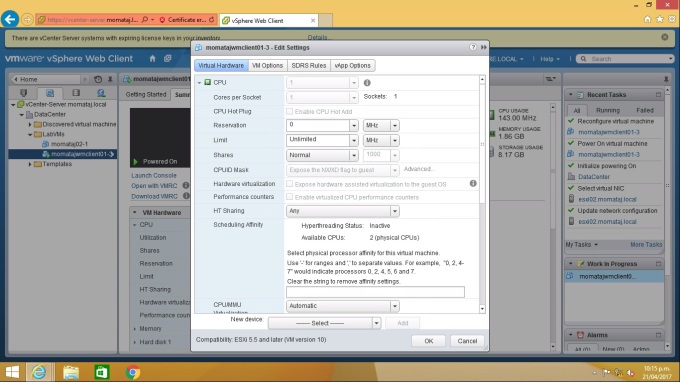
Repeat this task for all of your VMs.
Steps for the task: Perform a vSphere vMotion Migration of a Virtual Machine on a Shared Datastore
You can work with your VMs while migration is happening with the vSphere vMotion. vSphere vMotion allows to the Virual machine to perform its normal operation during migration.
Step 1: Go to the Home -> Hosts and Clusters

Step 2: Expand the Lab Servers and Click On you ESXi host. 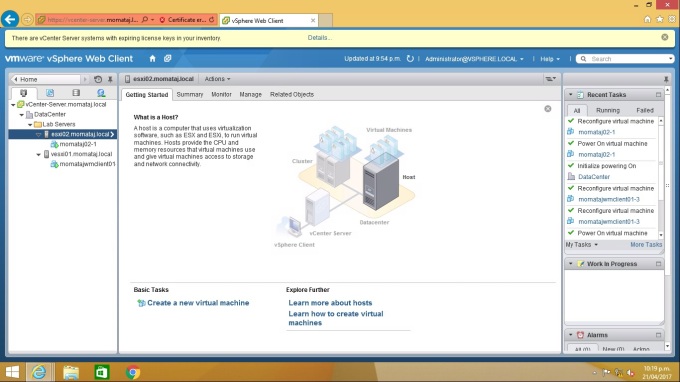
Step 3: Check your Virtual machine is power On. If it doesn’t. Power On Your VM machine and Select Open console or Open with VMRC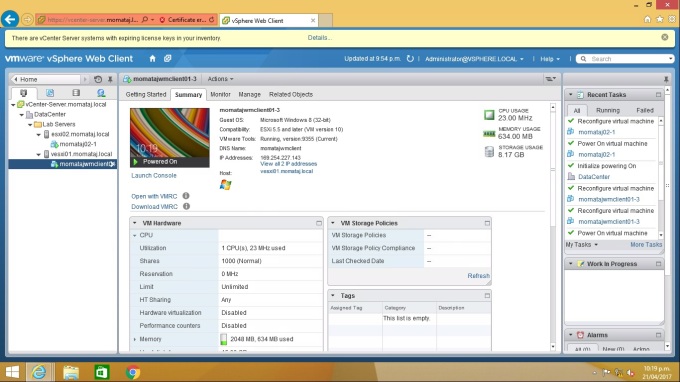
Step 4: Migrate your VM one one host to another host when your VM console is working. I migrated momatajvmclient01-3 from host 1 vesxi.momataj.local to host2 esxi02.momataj.local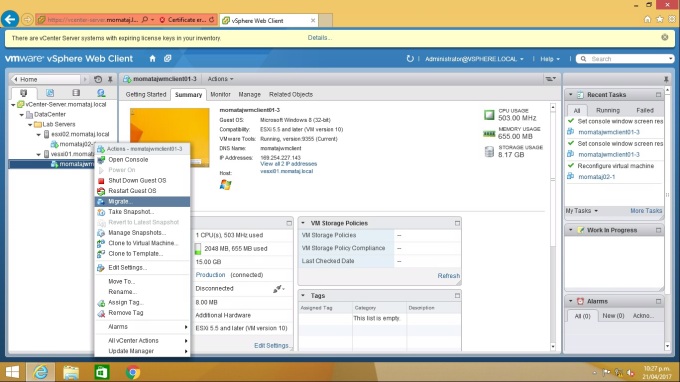
Step 5: A migrate wizard appears. Now you need to perform the following action that I showed on the screenshot.
Option 1: Select Migrate Type: Change host
Option 2: Select Destination Resources: Choose the second host of your system. And check the Compatibility. Note: If your RDM resides in a private LUN, the validation might not succeed.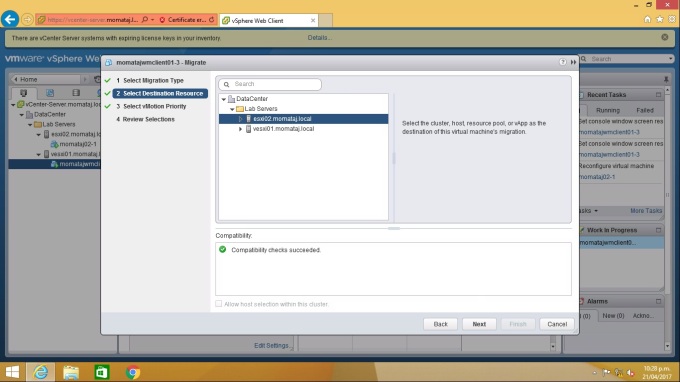
Option 4: Review the selections and Click “Finish“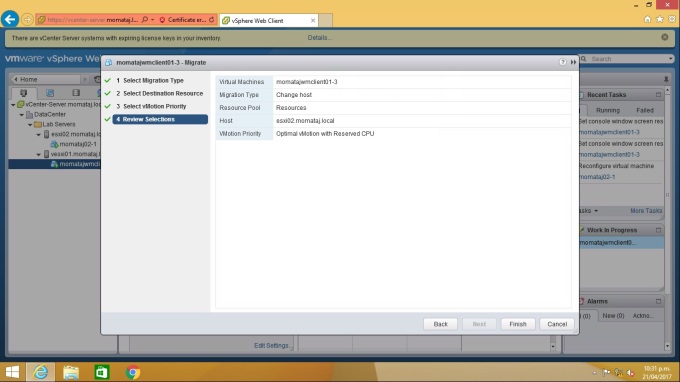
Step 6: Now you can see that migration is happening on the “Recent Tasks”. If you check your VM console and ping another VM. You will see no “Ping” drop during migration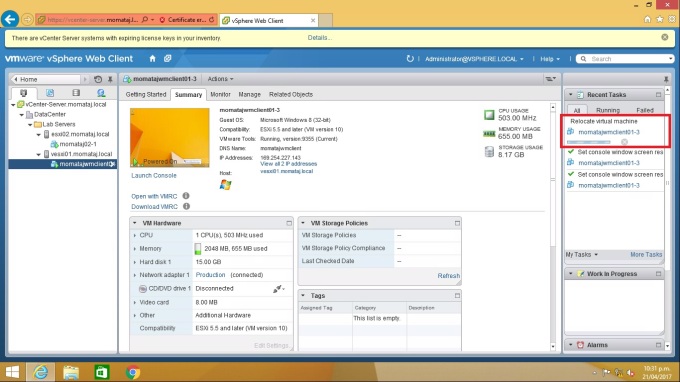
Step7: Now you can see migration is successfully happened from host 1 to host 2. You can test this task with your other virtual machines.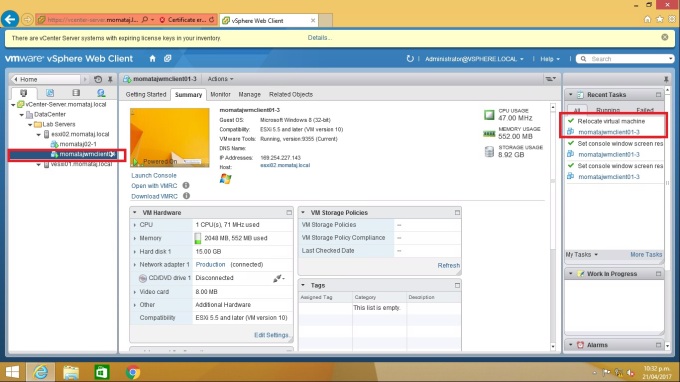
Steps for the task: Perform a Cross-Host vSphere Storage vMotion Migration to a Datastore
We can migrate Virtual machines to another host and datastore together through the vSphere vMotion without shared Storage.
Step 1: Select Home->vCenter -> Hosts and Clusters. Select a VM machine for migration from one host to another with datastore.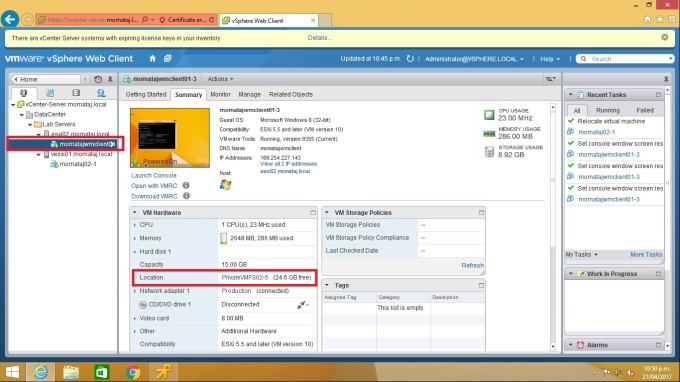
Step2: I selected momatajvmclient1-3 from host1 to host 1 and PrivateVMFS02-5 to Private VMFS-0304.
Right-Click on your VM and Click on ” Migrate”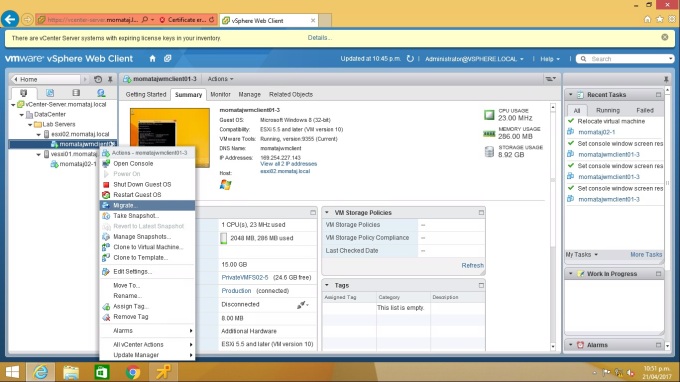
Step 3: Now you need to perform the migration action from Migrate Wizard
Option 1: Select Migrate type: Change both Host and Datastore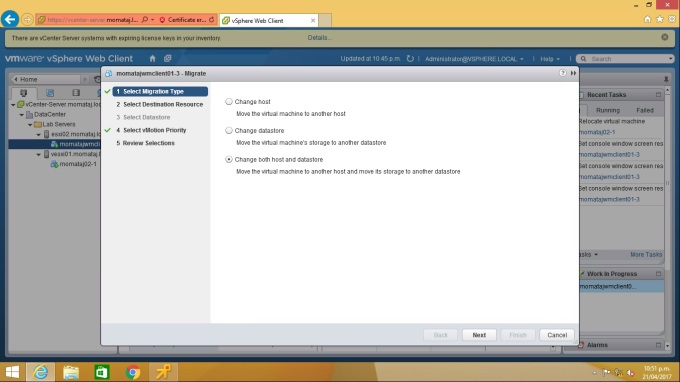
Option 2: Select Destination Resouces: your first host1 [ if VM current location is the first host]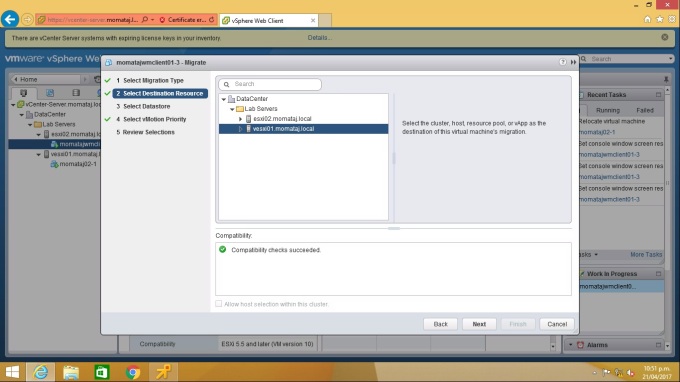
Option 3: Select Datastore [ Select a separate datastore that your VM doesn’t currently use]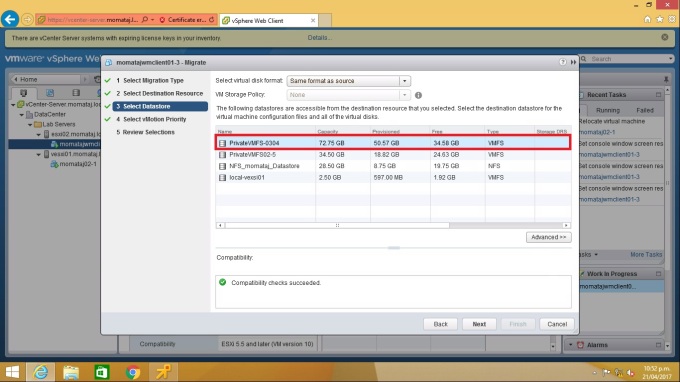
Option 4: Select vMotion Parity: Leave the default selection.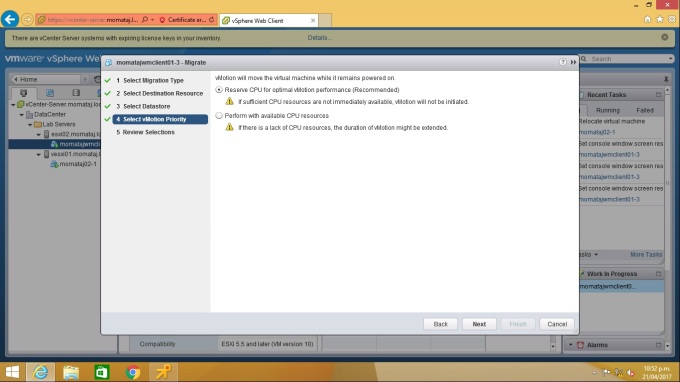
Option 5: Review the Selections before click “Finish”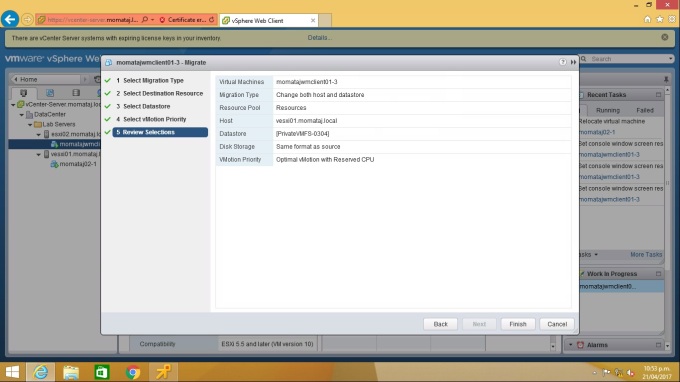
Step 4: Now you can monitor the process of the migration in the “Recent Tasks” bar.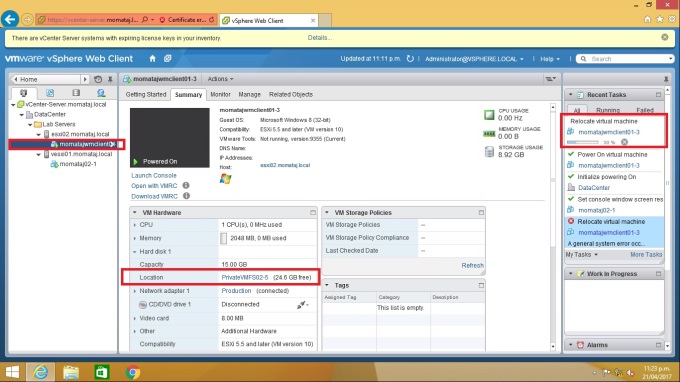
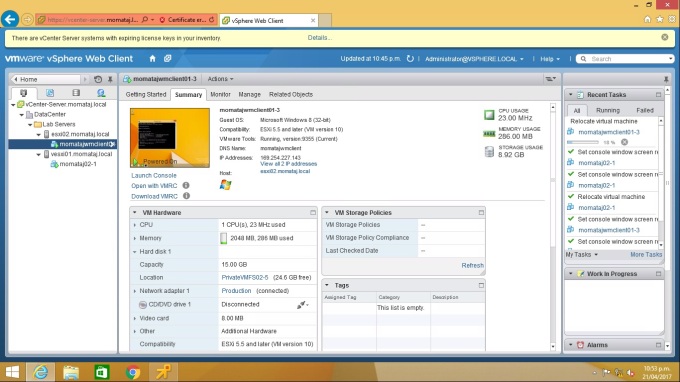
Step 5: Now you can see migration is complete successfully without any error. Virtual machine host and datastore has changed after migration,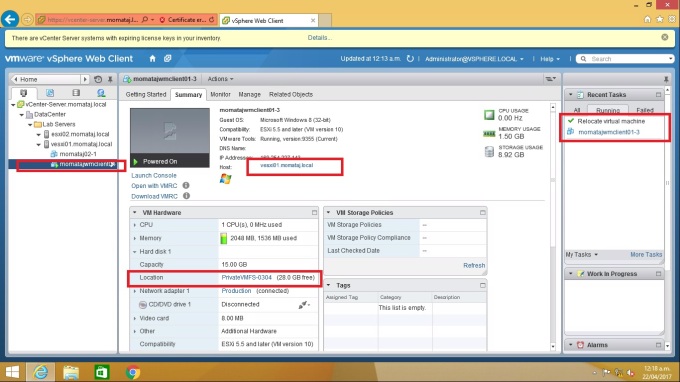
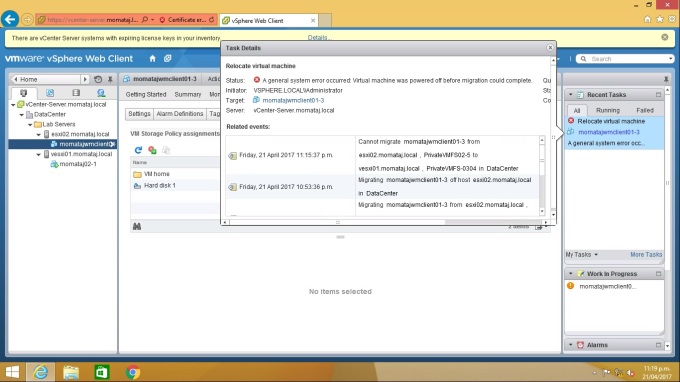
Problem and solution:
I got this following error during my migration process because my virtual machine got powered off in the middle of the migration. I powered On the machine and migration start again.
Thank you 🙂
